OTRS erlaubt es Ihnen, die Ticket-Status zu verändern oder neue Status hinzuzufügen. Hierbei gibt es zwei wichtige Optionen: den Namen des Status und Typ des Status.
Die standardmäßig voreingestellten Status lauten: 'neu', 'offen', 'erfolgreich geschlossen', 'erfolglos geschlossen', 'merged', 'entfernt', 'warten auf erfolgreich schließen', 'warten auf erfolglos schließen' und 'warten zur Erinnerung'.
Tickets sind normalerweise nur in diesem Status, wenn sie von eingehenden E-Mails neu erzeugt werden.
Nachdem die Wartezeit abgelaufen ist, erhält der Ticketbesitzer eine E-Mail zu dem Ticket. Wenn es nicht gesperrt ist, wird die Erinnerung an alle Agenten der Queue verschickt. Erinnerungs-Benachrichtigungen werden nur innerhalb der Arbeitszeiten versendet, und werden alle 24 Stunden wiederholt, bis der Status des Tickets vom Agenten verändert wird. Die Zeit, die dieses Ticket in diesem Status verbringt, wird dennoch bei der Berechnung der Eskalationszeiten einbezogen.
Wenn die Wartezeit abgelaufen ist, wird das Ticket auf "erfolglos geschlossen" gesetzt. Die Zeit, die dieses Ticket in diesem Status verbringt, wird dennoch bei der Berechnung der Eskalationszeiten einbezogen.
Wenn die Wartezeit abgelaufen ist, wird das Ticket auf "erfolgreich geschlossen" gesetzt. Die Zeit, die dieses Ticket in diesem Status verbringt, wird dennoch bei der Berechnung der Eskalationszeiten einbezogen.
This is the state for tickets that have been removed by the customer. Tickets will not really be deleted, they are just no longer shown as open. In order to enable this state in the customer interface you need to add the state type "removed" to the sysconfig setting "Ticket::Frontend::CustomerTicketZoom###StateType".
Endstatus für Tickets, die erfolgreich gelöst werden konnten. Je nach Konfiguration kann es unmöglich sein, geschlossene Tickets wieder zu eröffnen.
Every state has a name (state-name) and a type (state-type). Click on the States link on the Admin page and press the button "Add state" to create a new state. You can freely choose the name of a new state. The state types can not be changed via the web interface. The database has to be directly modified if you want to add new types or change existing names. The default state types should typically not be modified as this can yield unpredictable results. For instance, escalation calculations and the unlock feature are based on specific state types.
Im Admin-Interface können Sie innerhalb der Einstellungen für "Status" neue
Status für die vorhandenen Statustypen hinzufügen oder ändern. Beachten Sie,
dass Sie bei Änderungen am Status "neu - new" auch die entsprechenden
Änderungen in der KonfigurationsdateiKernel/Config.pm
bzw. mit Hilfe des grafischen Konfigurations-Front-End vornehmen
müssen. Folgende Änderungen müssen für einen geänderten "neu"-Status
vorgenommen werden:
    [...]
    # PostmasterDefaultState
    # (The default state of new tickets.) [default: new]
    $Self->{PostmasterDefaultState} = 'new';

    # CustomerDefaultState
    # (default state of new customer tickets)
    $Self->{CustomerDefaultState} = 'new';
    [...]
Skript: Anpassung der Einstellungen von Kernel/Config.pm.
Möchten Sie einen neuen Statustyp hinzufügen, müssen Sie zuerst die ticket_status-type-Tabelle in der OTRS Datenbank mit Hilfe eines entsprechenden Datenbankclient anpassen.
linux:~# mysql -p
Enter password:
Welcome to the MySQL monitor.  Commands end with ; or \g.
Your MySQL connection id is 23 to server version: 5.0.16-Debian_1-log

Type 'help;' or '\h' for help. Type '\c' to clear the buffer.

mysql> use otrs;
Reading table information for completion of table and column names
You can turn off this feature to get a quicker startup with -A

Database changed
mysql> insert into ticket_state_type (name,comments) values ('own','Own
state type');
Query OK, 1 row affected (0.00 sec)

mysql> quit
Bye
linux:~#
Skript: Anpassung der Statustypen.
Nun können Sie den neuen Statustyp verwenden. Nachdem ein Status mit diesem Statustyp verknüpft wurde, muss auch die OTRS-Konfiguration angepasst werden, damit der neue Status korrekt verwendet werden kann. Passen Sie die Folgenden Optionen in der SysConfig an:
Frontend::Agent::Ticket::ViewPhoneNew > AgentTicketPhone###StateDefault - to define the default next state for new phone tickets.
Frontend::Agent::Ticket::ViewPhoneNew > AgentTicketPhone###StateType - to define the available next states for new phone tickets.
Frontend::Agent::Ticket::ViewEmailNew > AgentTicketEmail###StateDefault - to define the default next state for new email tickets.
Frontend::Agent::Ticket::ViewEmailNew > AgentTicketEmail###StateType - to define the available next states for new email tickets.
Frontend::Agent::Ticket::ViewPhoneOutbound > AgentTicketPhoneOutbound###State - to define the default next state for new phone articles.
Frontend::Agent::Ticket::ViewPhoneOutbound > AgentTicketPhoneOutbound###StateType - to define the available next states for new phone articles.
Frontend::Agent::Ticket::ViewMove > AgentTicketMove###State - to define the default next state for moving a ticket.
Frontend::Agent::Ticket::ViewMove > AgentTicketMove###StateType - to define the available next states for moving a ticket.
Frontend::Agent::Ticket::ViewBounce > StateDefault - to define the default next state after bouncing a ticket.
Frontend::Agent::Ticket::ViewBounce > StateType - to define the available next states in the bounce screen.
Frontend::Agent::Ticket::ViewBulk > StateDefault - to define the default next state in a bulk action.
Frontend::Agent::Ticket::ViewBulk > StateType - to define the available next states in the bulk action screen.
Frontend::Agent::Ticket::ViewClose > StateDefault - to define the default next state after closing a ticket.
Frontend::Agent::Ticket::ViewClose > StateType - to define the available next states in the close screen.
Frontend::Agent::Ticket::ViewCompose > StateDefault - to define the default next state in the Compose (reply) screen.
Frontend::Agent::Ticket::ViewCompose > StateType - to define the available next states in the Compose (reply) screen.
Frontend::Agent::Ticket::ViewForward > StateDefault - to define the default next state after forwarding a ticket.
Frontend::Agent::Ticket::ViewForward > StateType - to define the available next states in the Forward screen.
Frontend::Agent::Ticket::ViewForward > StateDefault - to define the default next state of a ticket in the free text screen.
Frontend::Agent::Ticket::ViewForward > StateType - to define the available next states in the free text screen.
Core::PostMaster > PostmasterDefaultState - to define the state of tickets created from emails.
Core::PostMaster > PostmasterFollowUpState - to define the state of tickets after a follow-up has been received.
Core::PostMaster > PostmasterFollowUpStateClosed - to define the state of tickets after a follow-up has been received on an already closed ticket.
Core::Ticket > ViewableStateType - to define the state types that are displayed at various places in the system, for example in the Queueview.
Core::Ticket > UnlockStateType - to define the state types for unlocked tickets.
Core::Ticket > PendingReminderStateType - to define the state type for reminder tickets.
Core::Ticket > PendingAutoStateType - to define the state type for Pending Auto tickets.
Core::Ticket > StateAfterPending - to define the state a ticket is set to after the Pending Auto timer of the configured state has expired.
OTRS enthält 5 vordefinierte Ticketprioritäten, die mit dem "Prioritäten"-Modul im Administrationsbereich verwaltet werden können. Wenn Sie eine angepasste Prioritätenliste erstellen, bedenken Sie bitte, dass diese in der Prioritätsauswahl-Liste alphabetisch sortiert dargestellt werden. In der Queue-Ansicht ordnet OTRS die Prioritäten nach internen Datenbank-IDs.
Anmerkung
In OTRS können Prioritäten deaktiviert, aber nicht gelöscht werden. Wenn Sie eine Priorität deaktivieren wollen, setzen Sie den Wert für "Gültig" auf "ungültig" oder "ungültig-temporär".
Wichtig
Wenn eine Priorität hinzugefügt oder geändert wurde, müssen Sie ggf. einige Werte in der SysConfig anpassen:
Core::Postmaster::PostmasterDefaultPriority - defines the default priority for all incoming emails.
Frontend::Agent:Ticket::ViewPhoneNew:Priority - defines the default priority in the New Phone Ticket screen for agents.
Frontend::Agent:Ticket::ViewEmailNew:Priority - defines the default priority in the New Email Ticket screen for agents.
Frontend::Customer:Ticket::ViewNew:PriorityDefault - defines the default priority in the New Ticket screen in the Customer frontend.
Seit OTRS 2.1 kann zusätzlich zum Besitzer ein Verantwortlicher für das Ticket festgelegt werden. Zudem können alle Aktivitäten rund um das Ticket auch von jemand anderem als dem Besitzer beobachtet werden. Diese beiden Funktionalitäten sind mit den TicketResponsible- und dem TicketWatcher-Funktionen implementiert, und erleichtern das Zuweisen von Aufgaben und die Arbeit in hierarchischen Teamstrukturen.
The ticket responsibility feature facilitates the complete processing of a ticket by an agent other than the ticket owner. Thus an agent who has locked a ticket can pass it on to another agent, who is not the ticket owner, in order for the second to respond to a customer request. After the request has been dealt with, the first agent can withdraw the ticket responsibility from the second agent.
With the configuration parameter Ticket::Responsible, the ticket responsibility feature can be activated. This will cause 3 new links to appear in the ticket activities menu of a zoomed ticket in the agent interface.
Die Ticketverantwortung kann übergeben werden, indem das Ticket aufgerufen und die Funktion "Verantwortlicher" in der Aktionsleiste genutzt wird.
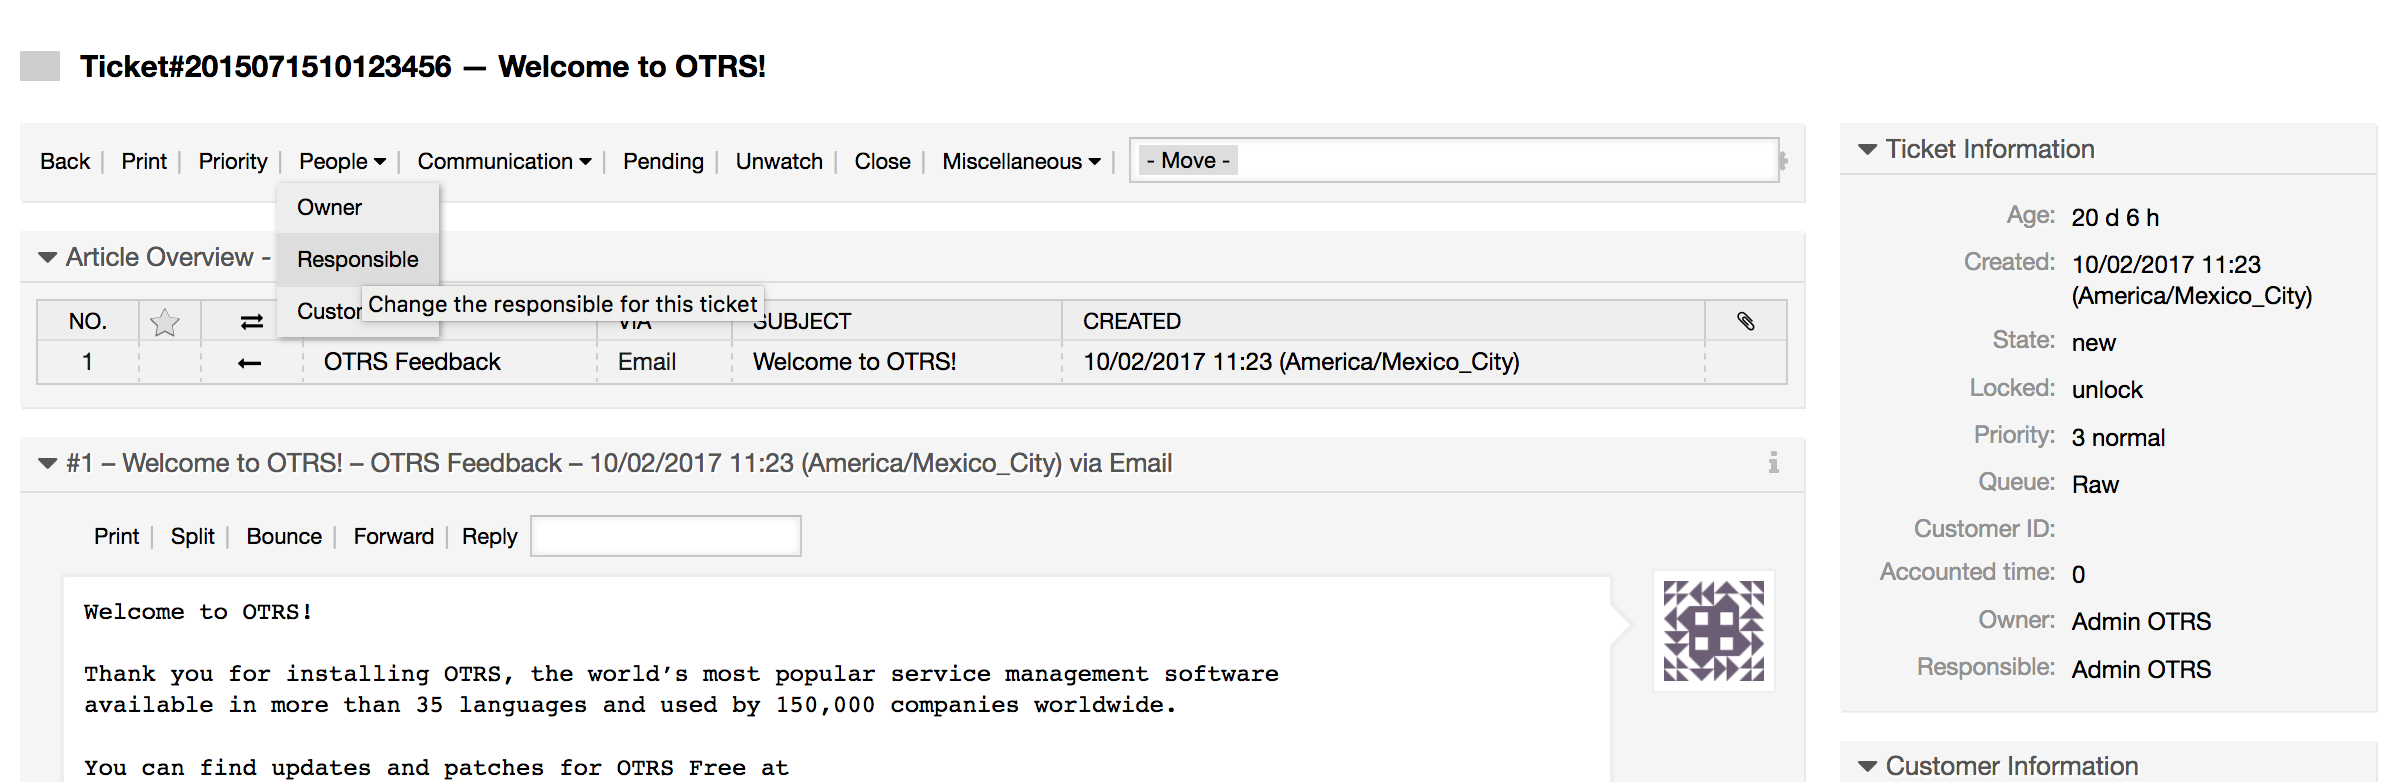
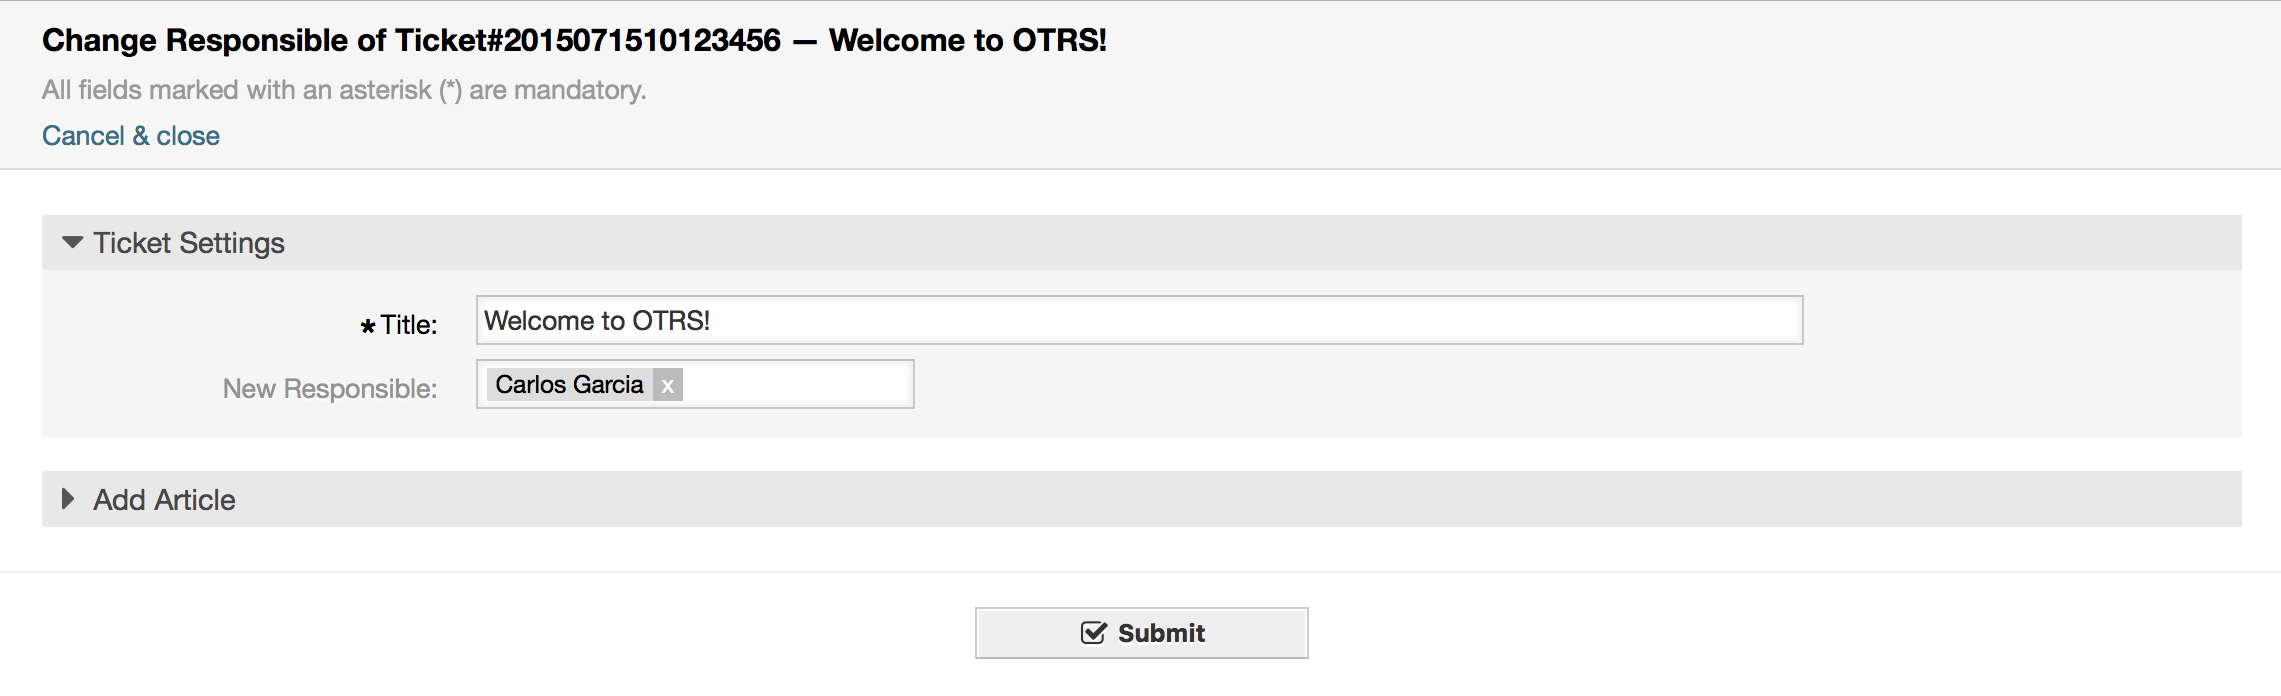
After clicking on "Responsible", a pop-up dialog to change the responsibility of that ticket will open (see figure below). This dialog can also be used to send a message to the new responsible agent.
Die Liste aller Tickets, für die ein Benutzer verantwortlich ist, kann durch die Ansicht "Verantwortliche Tickets" eingesehen werden. Diese kann über 3 Icons in der Toolbar aufgerufen werden, sobald das TicketResponsible-Feature aktiviert wird.
Sollen innerhalb des Ticket-Systems lediglich bestimmte Tickets z. B. von einem Abteilungsleiter beobachtet und nicht selbst bearbeitet werden, so kann dies seit OTRS 2.1 mit Hilfe des TicketWatcher-Features realisiert werden.
The TicketWatcher feature can be activated with the configuration parameter Ticket::Watcher which adds new links to your actions toolbar. Using Ticket::WatcherGroup, one or more user groups with permission to watch tickets can also be defined.
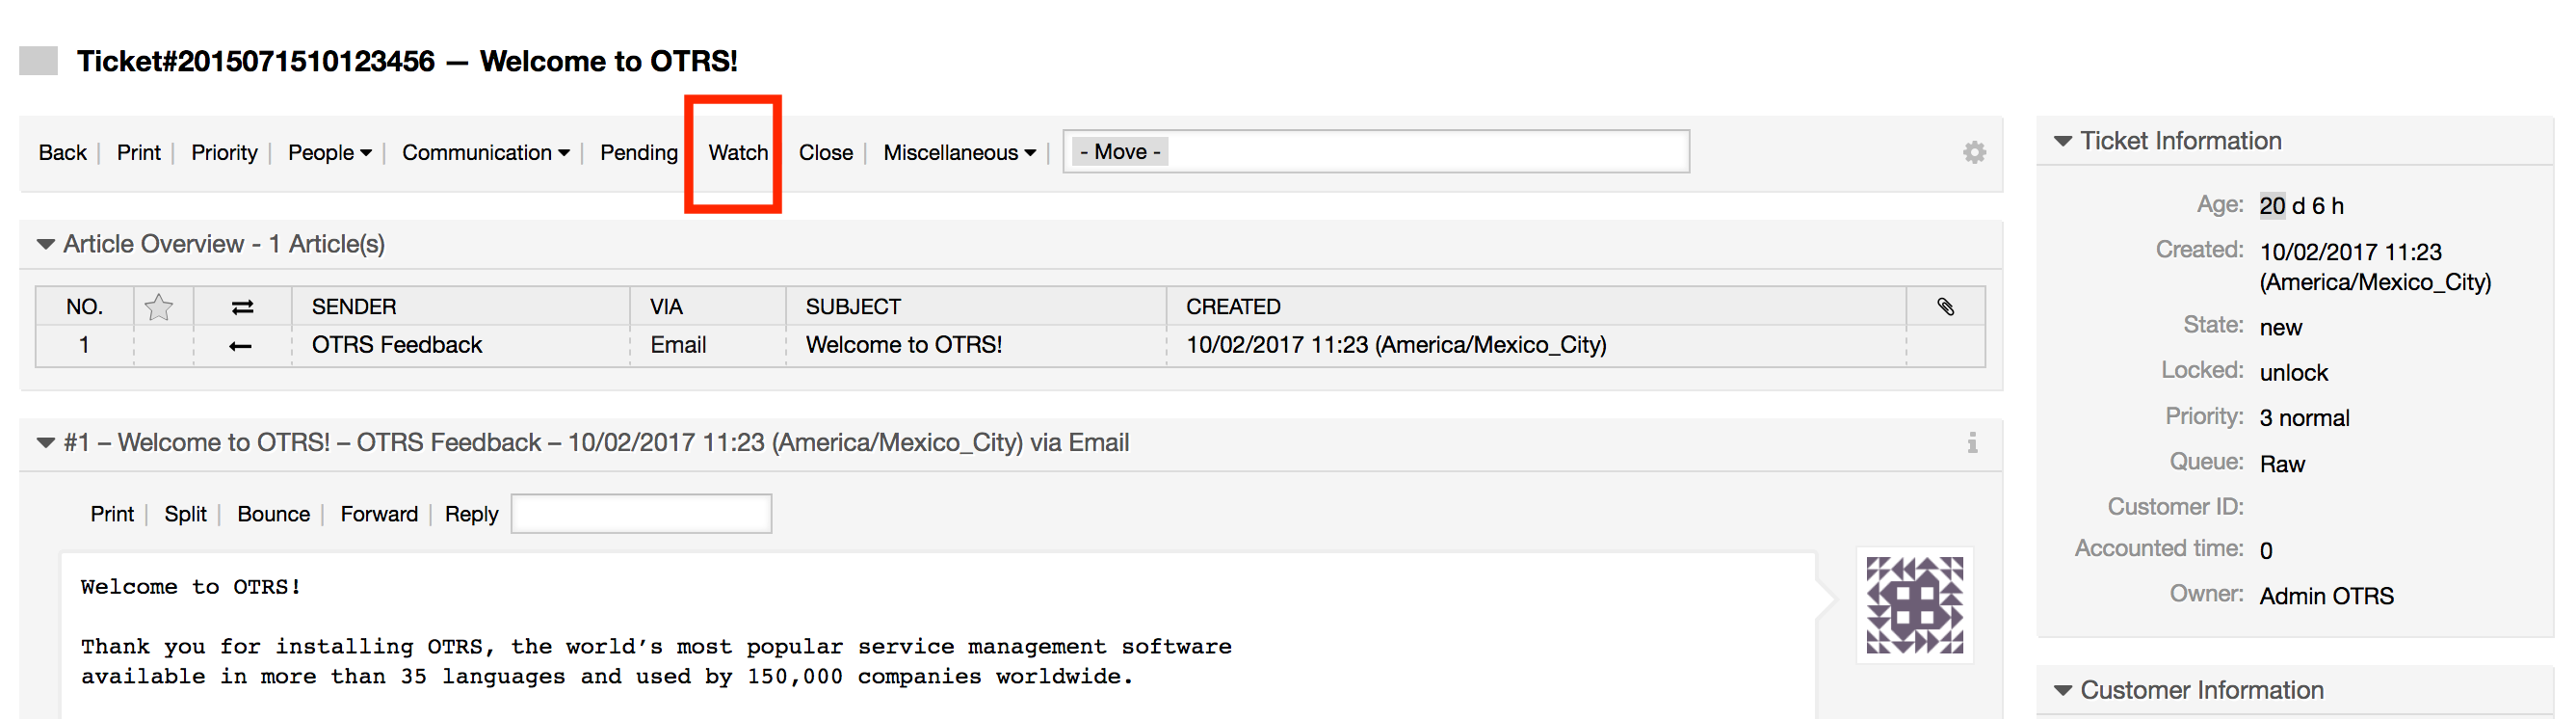
In order to watch a ticket, go to its zoomed view and click on the "Subscribe" link in the ticket activities menu (see figure below).
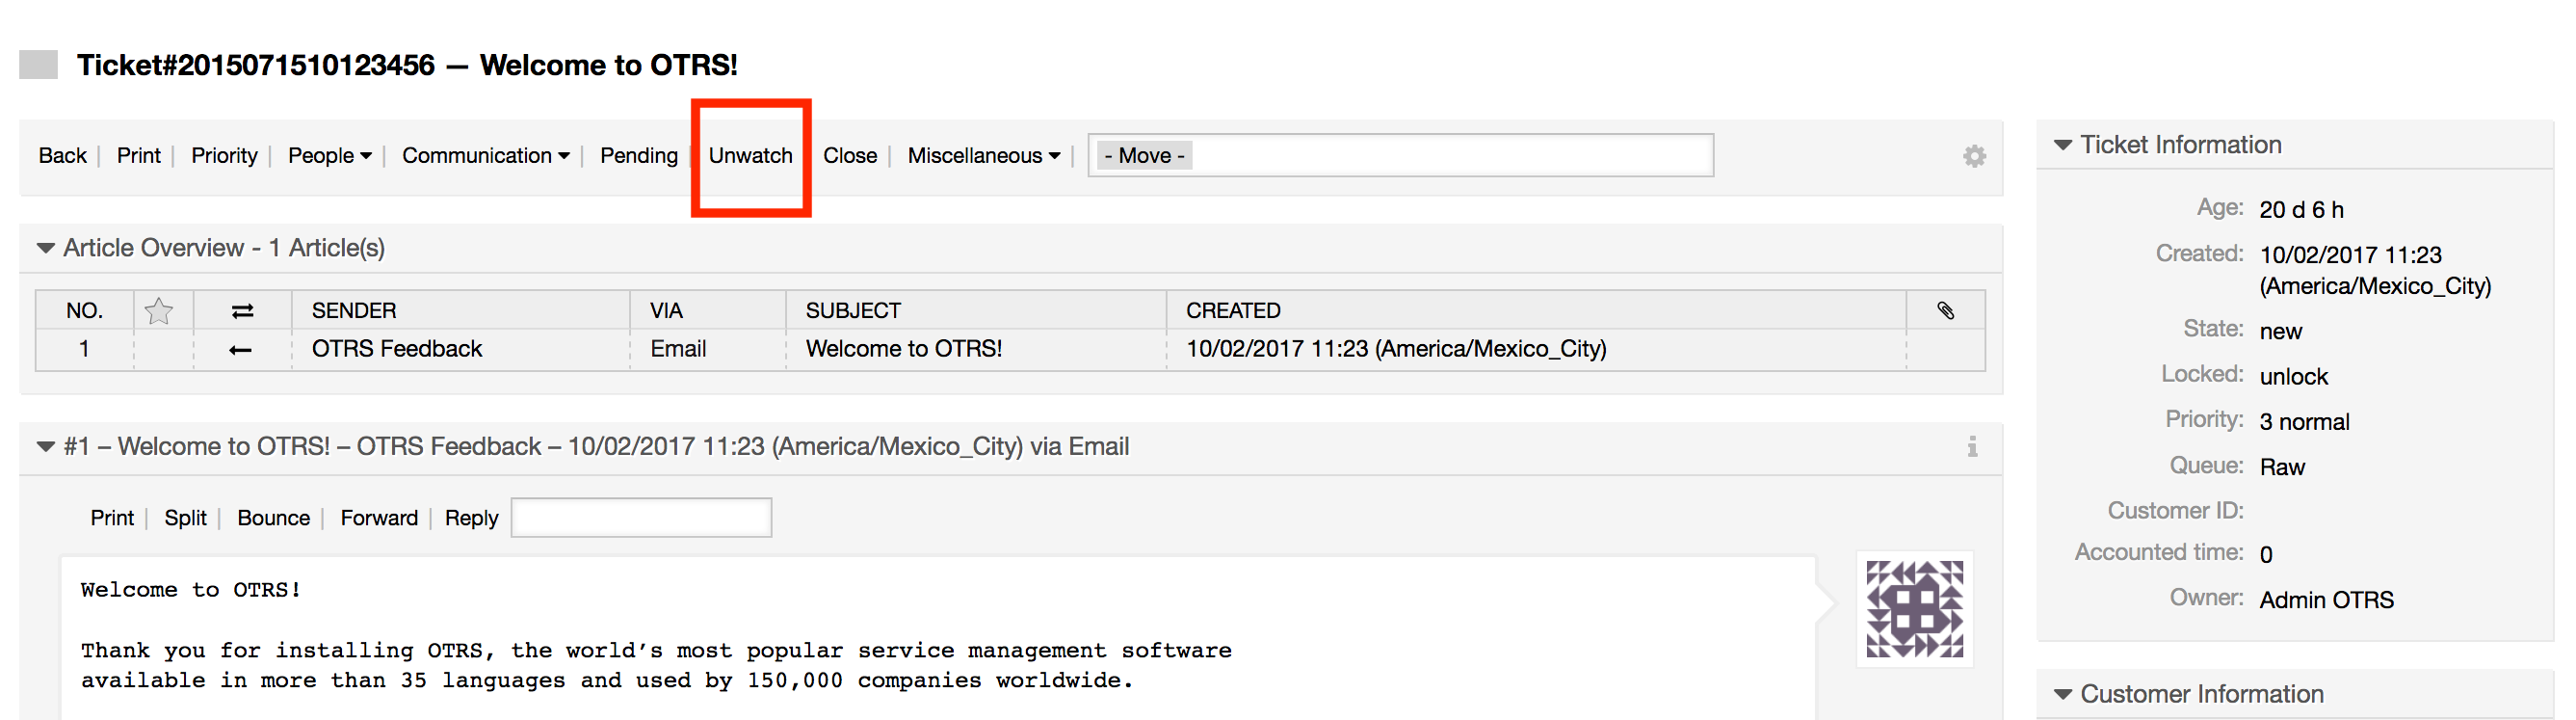
If you no longer want to watch a specific ticket, go to its zoomed view and click on the "Unsubscribe" link in the ticket activities menu (see figure below).
The list of all watched tickets can be accessed through the Watched view of the OTRS agent interface (see figure below), as soon as the ticket watcher feature gets activated.
