Diese Funktion erlaubt Ihnen in OTRS Prozesse (Work-Flows) zu modellieren. Die grundlegende Idee ist wiederkehrende Prozesse zu definieren und die Arbeit an verschiedene Personen zu delegieren, genauso um den Prozess in verschiedene Richtungen, basierend auf bestimmten Kriterien, zu führen.
Zur Demonstration schauen wir uns ein Beispiel an. Wir wollen die Bestellung eines Buches in einem Prozess abbilden.
Bevor eine Bestellung abgesetzt wird, wird die Anforderung eines Mitarbeiters von Literatur gespeichert. Das folgende Buch wird in unserem Beispiel benötigt:
Titel: Prozessmanagement für Dummies
Autor: Thilo Knuppertz
ISBN: 3527703713
Der Abteilungsleiter des Mitarbeiters muss über die Bestellung entscheiden. Im Falle einer Verweigerung sollte ein Grund vom Manager angegeben werden. Im Falle einer Genehmigung wird die Bestellung zur Einkauf-Abteilung weitergeleitet.
Die Einkauf-Abteilung muss nun herausfinden, wo das Buch zu den besten Konditionen bestellt werden kann. Wenn es ausverkauft ist kann das in der Bestellung vermerkt werden. Im Falle einer erfolgreichen Bestellung wird die Einkauf-Abteilung den Lieferanten, den Preis und das Lieferdatum aufnehmen.
Wenn wir davon ausgehen, dass sich ein Ticket in diesem Work-Flow wie ein Begleitdokument verhält, das Veränderungen als Notizen empfängt, dann haben wir schon ein klares Bild der Prozess-Tickets.
Nach der Analyse des Beispielprozesses, konnten wir folgende nötigen Elemente identifizieren:
Möglichkeiten zur Datenaufnahme, hier Aktivitäten-Dialoge,
Kontrollen, die automatisch auf geänderte Daten reagieren kann, nennen wir sie Übergänge,
Änderungen, die sich auf ein Prozess-Ticket nach erfolgreichem Übergang eines Prozess-Ticket angewendet werden können, nennen wir sie Übergangsaktionen.
Wir brauchen noch ein zusätzliches Element, was nicht so offensichtlich sein könnte:
Eine Möglichkeit mehr als nur einen Aktivitätsdialog zur Verfügung zustellen. In unserem Beispiel ist das erforderlich, wenn die Führungskraft zwischen "Genehmigen" und "Ablehnen" zu entscheiden hat. Nennen wir sie Aktivität .
Mit Aktivitäten, Aktivitätsdialogen, Übergängen und Übergangsaktionen haben wir die notwendigen Werkzeuge, um die einzelnen Schritte unseres Beispiels zu modellieren. Was ist noch fehlt, ist ein Bereich, wo für jeden Arbeitsablauf die Reihenfolge der Schritte festgelegt wird. Nennen wir diesen Prozess. Um uns auf all diese Personen später beziehen zu können, werden wir ihnen in Klammern eine Abkürzung zuweisen. Diese Abkürzungen basieren auf einem internen Identifikations-Mechanismus namens EntityIDs.
Die EntityIDs werden mit einem oder zwei Buchstaben (je nach Prozessteil) und einer fortlaufenden Nummer gebildet, Beispiel:
Prozess: 'P1', 'P2' ... 'Pn'.
Aktivität: 'A1', 'A2' ... 'An'.
Aktivitätsdialog: 'AD1', 'AD2' ... 'ADn'.
Übergang: 'T1', 'T2' ... 'Tn'.
Übergangsaktivität: 'TA1', 'TA2' ... 'TAn'.
Vor der Erstellung des Prozesses und seiner Abschnitte ist es notwendig, das System vorzubereiten, wir müssen sowohl einige Queues, Nutzer und Dynamic Fields definieren, als auch ein paar SysConfig-Optionen festlegen.
Erstellen Sie die folgenden Queues:
Management
Mitarbeiter
Einkauf
Post
Erstellen Sie die folgenden Benutzer:
Manager
Mitarbeiter
Erstellen Sie die folgenden DynamicFields
Titel
Beschriftung Titel Typ Text Objekt Ticket Autor
Beschriftung Autor Typ Text Objekt Ticket ISBN
Beschriftung ISBN Typ Text Objekt Ticket Status
Beschriftung Status Typ Einfachauswahl Objekt Ticket mögliche Werte Genehmigung
Genehmigung abgelehnt
genehmigt
Bestellung abgelehnt
Bestellung aufgegeben
Sendung empfangen
Bemerkung: Bitte benutzen Sie exakt diese möglichen Werte für "Schlüssel" und "Wert" in den DynamicField-Einstellungen
Lieferant
Beschriftung Lieferant Typ Text Objekt Ticket Preis
Beschriftung Preis Typ Text Objekt Ticket LieferDatum
Beschriftung Liefertermin Typ Datum Objekt Ticket Eingangsdatum
Beschriftung Datum des Eingangs Typ Datum Objekt Ticket
Setzen Sie die folgenden SysConfig-Einstellungen:
'Ticket::Responsible': Ja
'Ticket::Frontend::AgentTicketZoom###ProcessWidgetDynamicFieldGroups':
Schlüssel: Inhalt: Buch Titel, Autor,ISBN Allgemein Status Auftrag Preis, Lieferant,Liefertermin Lieferung Eingangsdatum 'Ticket::Frontend::AgentTicketZoom###ProcessWidgetDynamicField':
Schlüssel: Inhalt: Autor 1 Eingangsdatum 1 LieferDatum 1 ISBN 1 Preis 1 Status 1 Lieferant 1 Titel 1
Fangen wir mit dem realen Prozessmanagement an. Im nächsten Schritt werden wir die einzelnen Objekte, die wir benötigen, definieren.
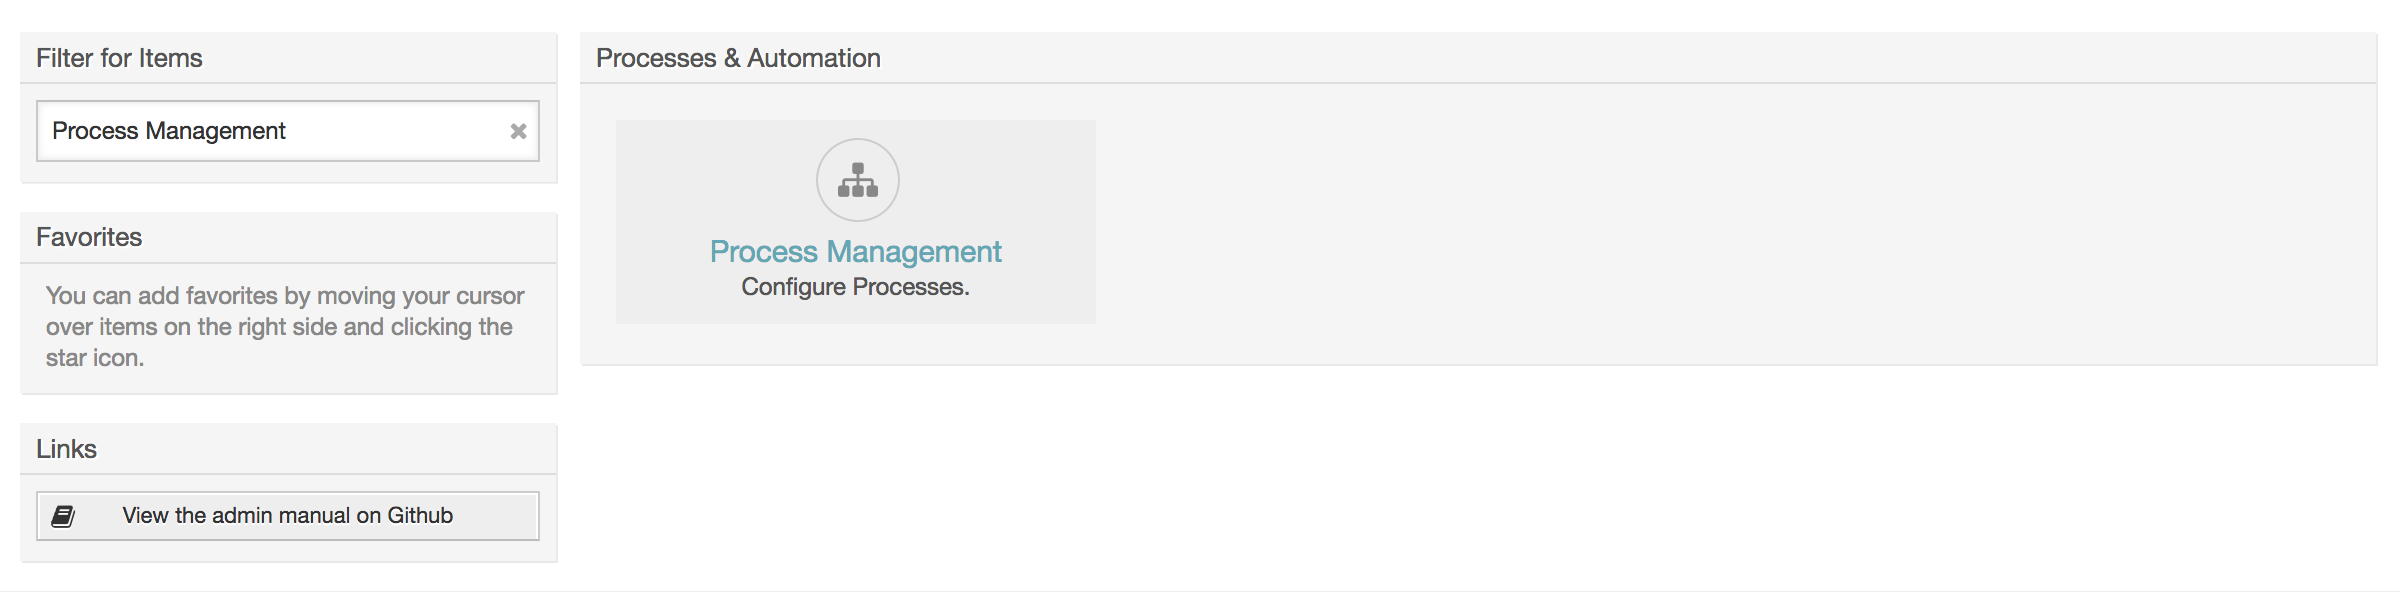
Um einen neuen Prozess zu erstellen ist es notwendig auf den Link "Prozess Management" in der Systemverwaltungs-Box im Admin-Menü zu klicken, anschließend gelangen wir zur Prozessmanagement-Übersicht. Nachdem der Prozess erstellt wurden, können wir alle anderen Objekte (oder Prozessteile) erstellen.
Anmerkung
Aktivitäten, Aktivitätsdialoge, Übergänge und Übergangsaktionen die in einem Prozess definiert wurden, sind ebenfalls für alle anderen Prozesse im System verfügbar.
Klicken Sie auf "Neuen Prozess erstellen" im Adminmenü
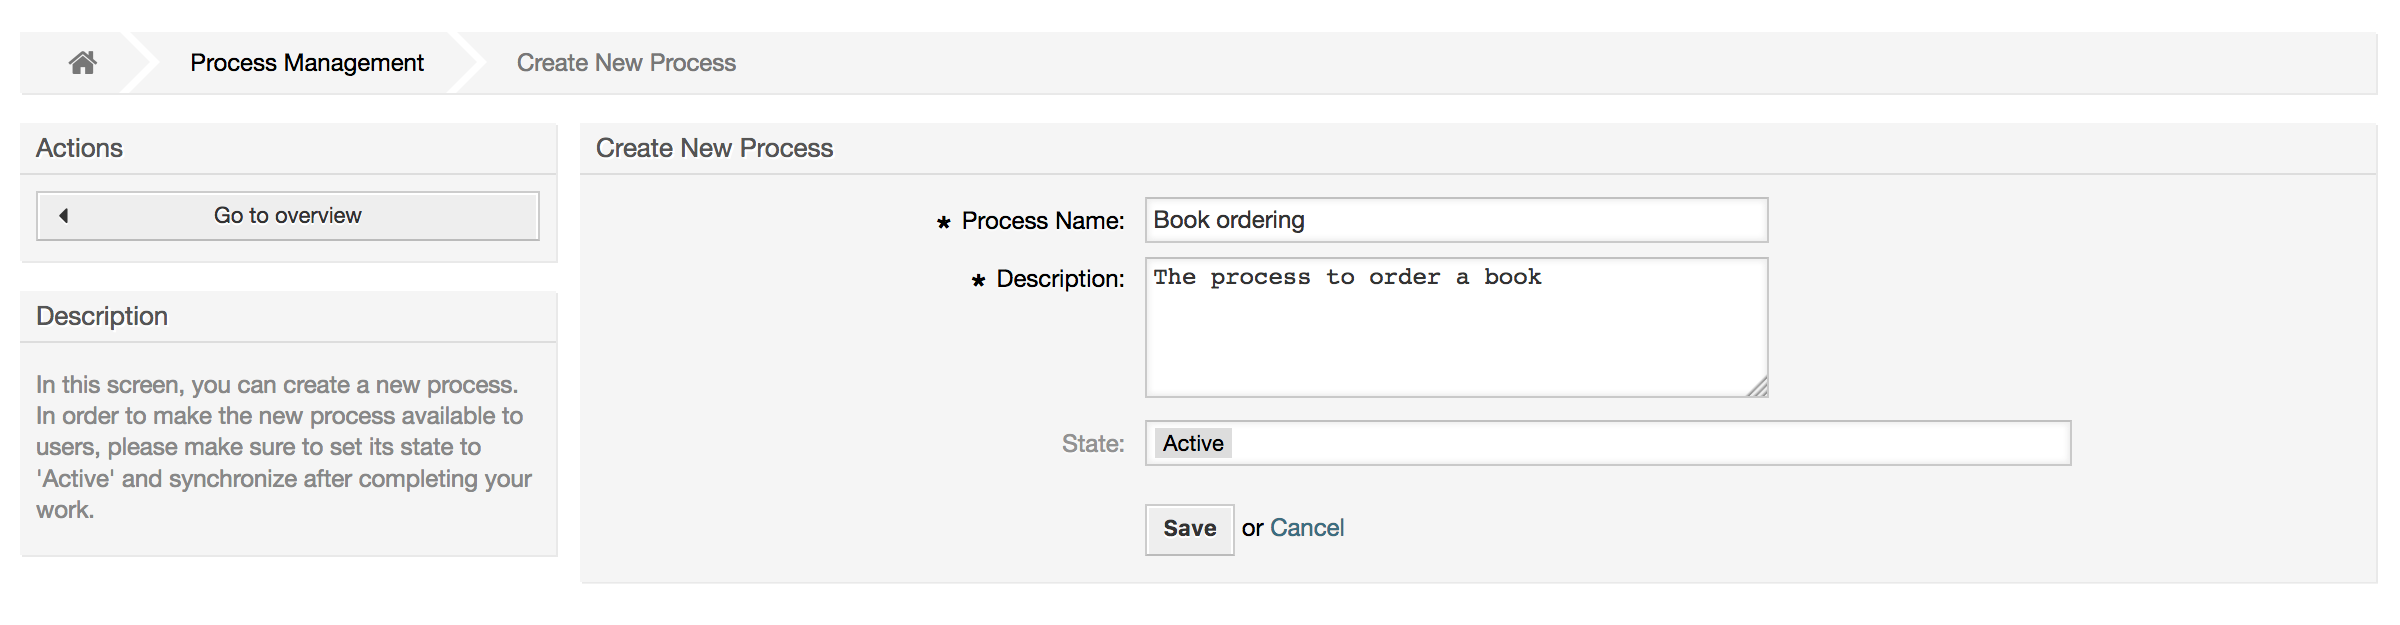
Füllen Sie die Prozessinformationen aus, definieren Sie einen Prozessname und die Beschreibung für diesen Prozess, wir belassen den Prozessstatus auf "inaktiv", bis wir alle Aufgaben erledigt haben. Speichern Sie den Vorgang.
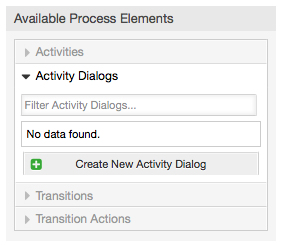
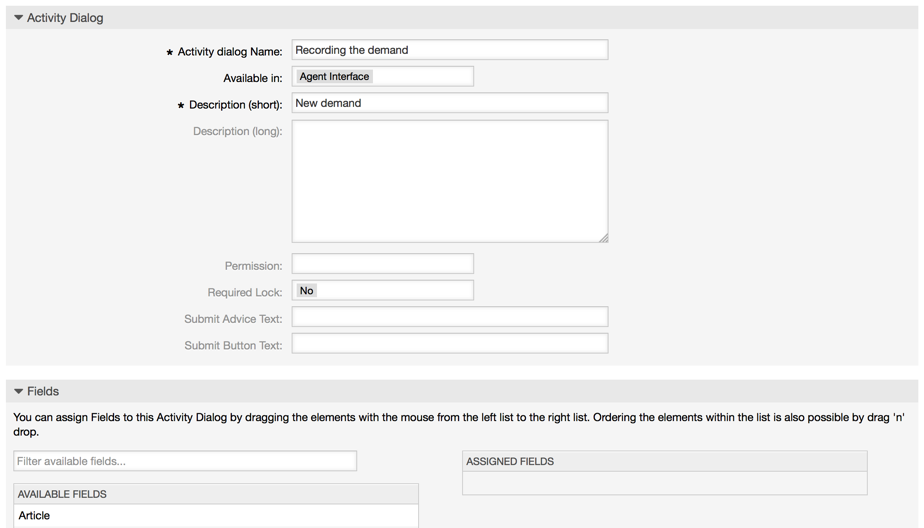
Click on the new process name in the Process Management Overview Screen, then in the "Available Process Elements" click in "Activity Dialogs" (this action will expand the activity dialog options and will collapse all others doing an accordion like effect), then click on "Create New Activity Dialog".
In the opened popup screen fill the "Activity dialog Name" as well as the "Description (short)" fields, for this example we will leave all other fields as the default, to assign fields to the Activity Dialog simple drag the required field from the "Available Fields" pool and drop into the "Assigned Fields" pool. The order in the "Assigned Fields" pool is the order as the fields will have in the screen, to modify the order simply drag and drop the field within the pool to rearrange it in the correct place.
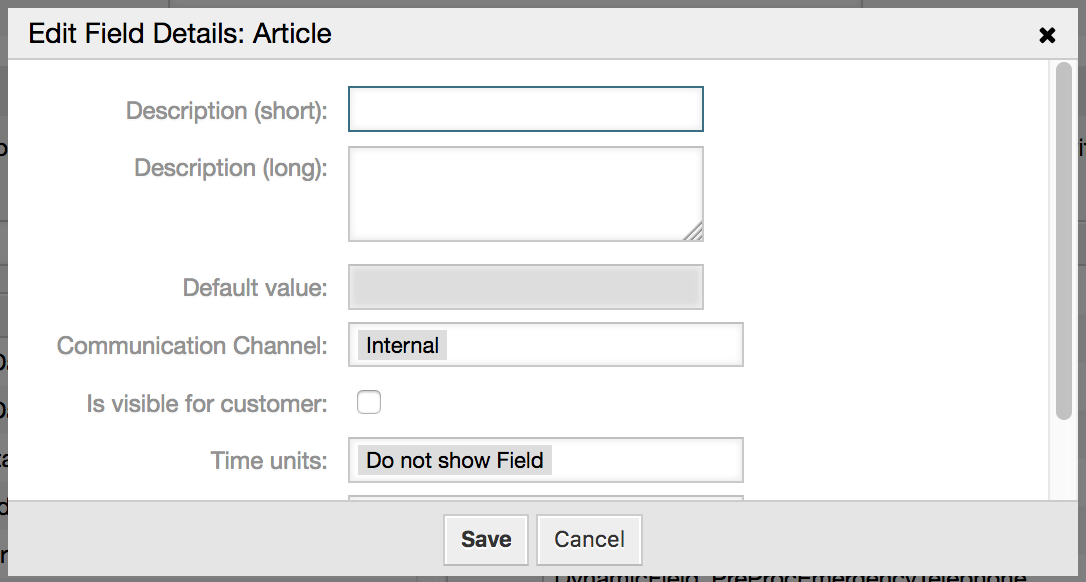
As soon as the fields are dropped into the "Assigned Fields" pool another popup screen is shown with some details about the field, we will leave the default options and only for Article fields we should make sure that the CommunicationChannel field is set to "Internal" and that the IsVisibleForCustomer is not active.
Nachdem alle Felder zugewiesen wurden, klicken Sie auf übermitteln in der PopUp-Oberfläche damit die Änderungen gespeichert werden.
In this example we will use Article field for comments, but another option could be to create a TextArea type Dynamic Field, the rest of the mentioned fields in the lines below are the Dynamic Fields that we define before.
Please be aware that in this screen all the Dynamic Fields has the prefix "DynamicField_" as in "DynamicField_Title". Do not confuse with the field "Title" that is the Ticket Title.
Erstellen Sie die folgenden Aktivitätsdialoge:
"Aufnahme der Nachfrage" (AD1)
Ein Aktivitätsdialog, welcher alle erforderlichen Felder für die Daten der Bestellung enthält (Titel, Autor und ISBN) und ein Statusfeld mit der Möglichkeit "Approval" zu wählen.
"Genehmigung verweigert" (AD2)
Ein Aktivitätsdialog mit einem Kommentarfeld (Artikel) und einem Statusfeld mit der Möglichkeit "Approval denied".
"Genehmigt" (AD3)
Hier benötigen Sie das Statusfeld mit der Option "Genehmigt".
"Bestellung abgelehnt" (AD4)
Ein Aktivitsdialog, welcher es ermöglicht eine unmögliche Bestellung abzulehnen (Buch ist nicht auf Lager). Hier wird ebenfalls ein Kommentarfeld und ein Statusfeld mit der Option "Order denied" benötigt.
"Bestellung aufgegeben" (AD5)
Ein Aktivitätsdialog mit den Feldern Lieferant, Preis und Lieferdatum und dem Statusfeld mit der Option "Bestellung abgegeben".
"Sendung empfangen" (AD6)
Eine Aktivität für die Poststelle mit einem Feld für das Empfangsdatum und dem Statusfeld mit der Option "Bestellung empfangen".
To restrict the Status field for each activity dialog we need to add some
ACLs in the Kernel/Config.pm or to a new Perl file
located in Kernel/Config/Files.
    $Self->{TicketAcl}->{'P1-AD1-1'} = {
        Properties => {
            Process => {
                ActivityDialogEntityID => ['AD1'],
            },
        },
        Possible => {
            Ticket => {
                DynamicField_Status => ['Approval'],
            },
        },
    };

    $Self->{TicketAcl}->{'P1-AD2-1'} = {
        Properties => {
            Process => {
                ActivityDialogEntityID => ['AD2'],
            },
        },
        Possible => {
            Ticket => {
                DynamicField_Status => ['Approval denied'],
            },
        },
    };

    $Self->{TicketAcl}->{'P1-AD3-1'} = {
        Properties => {
            Process => {
                ActivityDialogEntityID => ['AD3'],
            },
        },
        Possible => {
            Ticket => {
                DynamicField_Status => ['Approved'],
            },
        },
    };

    $Self->{TicketAcl}->{'P1-AD4-1'} = {
        Properties => {
            Process => {
                ActivityDialogEntityID => ['AD4'],
            },
        },
        Possible => {
            Ticket => {
                DynamicField_Status => ['Order denied'],
            },
        },
    };

    $Self->{TicketAcl}->{'P1-AD5-1'} = {
        Properties => {
            Process => {
                ActivityDialogEntityID => ['AD5'],
            },
        },
        Possible => {
            Ticket => {
                DynamicField_Status => ['Order placed'],
            },
        },
    };

    $Self->{TicketAcl}->{'P1-AD6-1'} = {
        Properties => {
            Process => {
                ActivityDialogEntityID => ['AD6'],
            },
        },
        Possible => {
            Ticket => {
                DynamicField_Status => ['Shipment received'],
            },
        },
    };
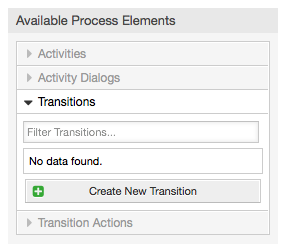
Klicken Sie in den "Verfügbaren Prozesselementen" auf "Übergänge", anschließend klicken Sie auf "Erstelle neue Übergans-Aktion".
In dem öffnenden Popup füllen Sie bitte den "Übergangsnamen" aus, anschließend tragen Sie die benötigten Zustände ein. In diesem Beispiel werden wir nur einen Zustand und nur ein Feld benutzen. Für diese beiden lassen für den Linktyp auf "and" und wir werden den Match-Type-Wert als "String" nutzen.
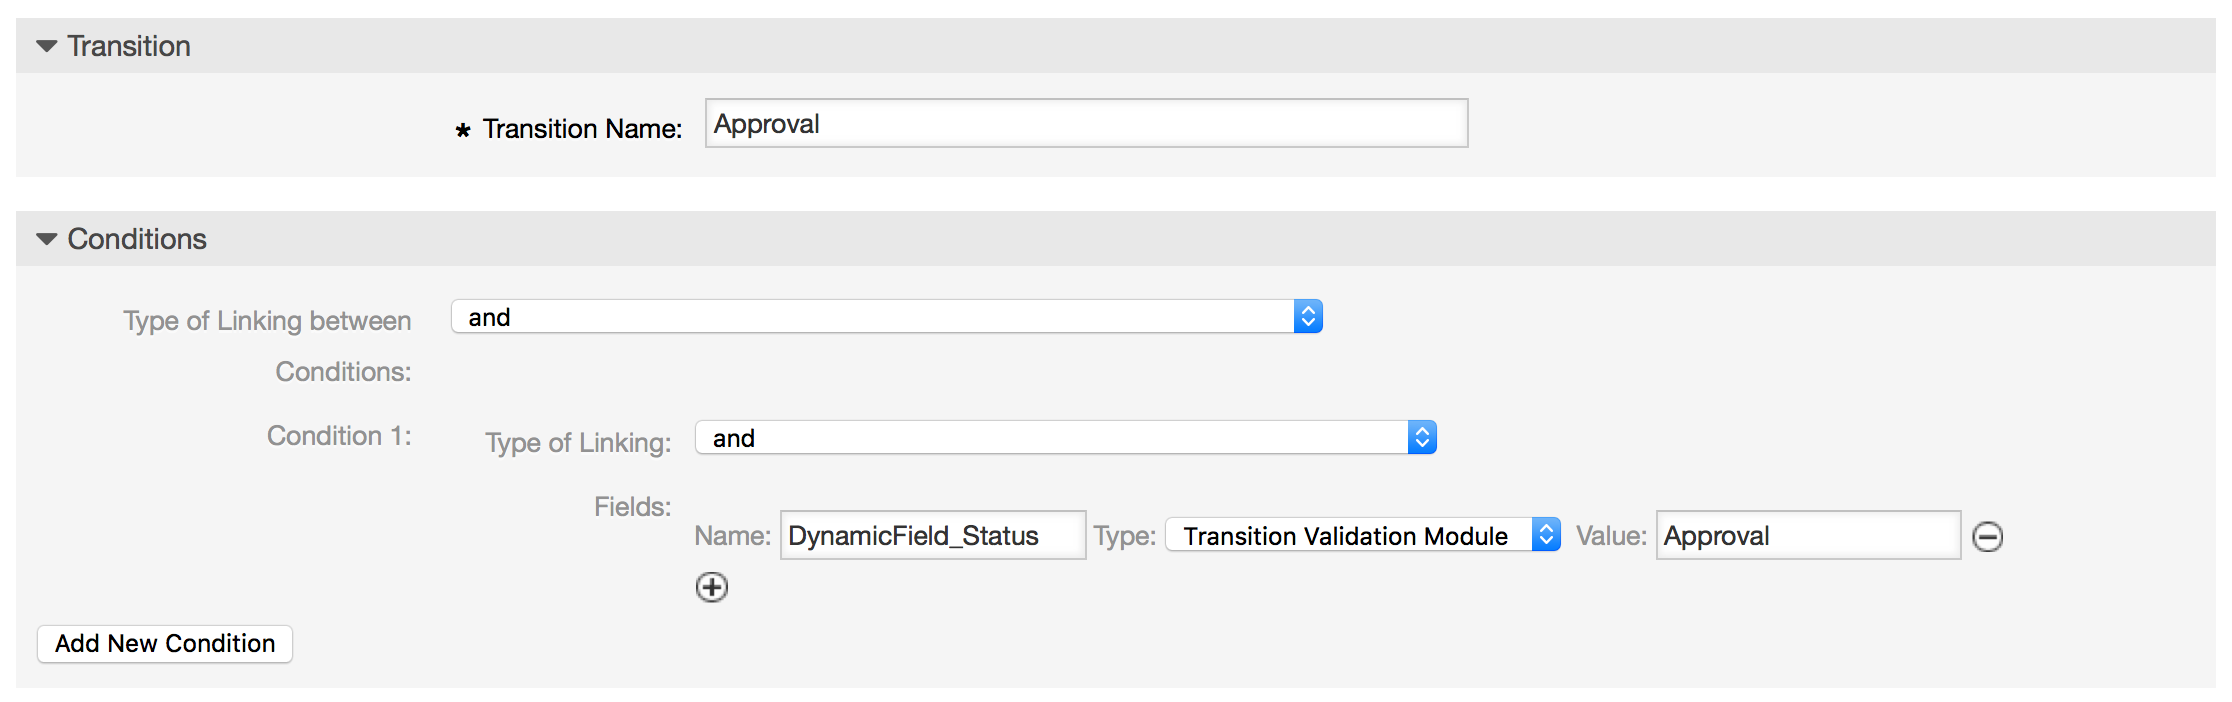
Nachdem alle Parameter und Werte gesetzt worden sind, klicken Sie auf die "Übermitteln"-Schaltfläche um die Werte zu speichern.
Erstellen Sie die folgenden Übergänge:
"Genehmigung" (T1)
Ein Übergang, der überprüft ob das Statusfeld auf "Genehmigung" gesetzt ist.
"Genehmigung verweigert" (T2)
Ein Übergang, der überprüft ob das Statusfeld auf "Genehmigung verweigert" gesetzt ist.
"Genehmigt" (T3)
Ein Übergang, der überprüft ob das Statusfeld auf "Genehmigung erteilt" gesetzt ist.
"Bestellung abgelehnt" (T4)
Ein Übergang, der überprüft ob das Statusfeld auf "Bestellung verweigert" gesetzt ist.
"Bestellung aufgegeben" (T5)
Ein Übergang, der überprüft ob das Statusfeld auf "Bestellung aufgegeben" gesetzt ist.
"Sendung empfangen" (T6)
Ein Übergang, der überprüft ob das Statusfeld auf "Sendung empfangen" gesetzt ist.
Klicken Sie auf "Übergangs-Aktionen" in den "Verfügbaren Prozesselementen", anschließend klicken Sie auf "Erstelle neue Übergans-Aktion".
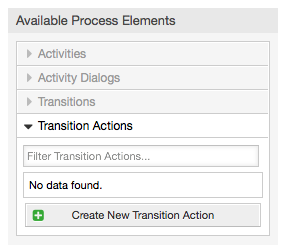
In the opened popup screen fill the "Transition Action Name", and the "Transition Action module" then add the required and optional parameter names and values.
All the Transition Action Modules are located in
Kernel/System/ProcessManagement/TransitionAction and
the following is the list of bundled Transition Actions included in this
release:
DynamicFieldSet
TicketArticleCreate
TicketCreate
TicketCustomerSet
TicketLockSet
TicketOwnerSet
TicketQueueSet
TicketResponsibleSet
TicketServiceSet
TicketSLASet
TicketStateSet
TicketTitleSet
TicketTypeSet
Jedes Modul hat seine eigenen und verschiedenen Parameter. Eine Übersicht aller benötigten und optionalen Parameter finden Sie unter Moduldokumentation.
Anmerkung
From OTRS 4.0.1, parameters are not longer mandatory fixed values, but instead, they can inherit from the original ticket using format: <OTRS_Ticket_property>.
From OTRS 4.0.6, the format <OTRS_TICKET_property> is now supported, older format is still usable, but deprecated as it will be dropped in further versions.

Nachdem alle Parameter und Werte gesetzt worden sind, klicken Sie auf die "Übermitteln"-Schaltfläche um die Werte zu speichern.
Erstellen Sie die folgenden Übergangs-Aktionen:
"Verschiebe das Prozessticket in die Management-Queue" (TA1)
Diese Aktion wird vermutlich ausgeführt wenn der Übergang "Approval" (T1) angewandt wurde.
"Ändere den Ticket-Verantwortlichen zu 'Manager'" (TA2)
Wird ausgeführt, wenn der Übergang "Approval" (T1) ausgeführt wurde.
"Move process ticket into the 'Employees' queue" (TA3)
Wird ausgeführt, wenn:
Der Übergang "Approval denied" (T2) wird ausgeführt
Der Übergang "Order denied" (T4) wird ausgeführt.
Der Übergang "Shipment received" (T6) wird ausgeführt
Ändere den Ticket-Verantwortlichen zu 'Employee'" (TA4)
Wird ausgeführt, wenn:
Der Übergang "Approval denied" (T2) wird ausgeführt
Der Übergang "Order denied" (T4) wird ausgeführt.
Der Übergang "Shipment received" (T6) wird ausgeführt
"Verschiebe das Prozessticket in die 'Purchasing'-Queue" (TA5)
Wird ausgeführt, wenn der Übergang "Approved" (T3) ausgeführt wurde.
"Verschiebe das Prozessticket in die 'Post office'-Queue" (TA6)
Wird ausgeführt, wenn der Übergang "Order placed (T5) ausgeführt wurde.
"Ticket erfolgreich schließen" (TA7)
Wird ausgeführt, wenn:
Der Übergang "Shipment received" (T6) wird ausgeführt
Ticket erfolglos schließen" (TA8)
Wird ausgeführt, wenn:
Der Übergang "Approval denied" (T2) wird ausgeführt
Der Übergang "Order denied" (T4) wird ausgeführt.
Wie Sie sehen, gibt es Orte an denen gleiche Übergangsaktionen ausgeführt werden sollen. Deshalb ist es sinnvoll Übergangsaktionen frei mit Übergängen zu verknüpfen, um sie wiederverwenden zu können.
We chose the approach to see Activities as a basket which can contain one or more Activity Dialogs.
Klicken Sie auf "Aktivitäten" in den verfügbaren "Prozesselementen", anschließend klicken Sie auf "Erstelle neue Aktivität".

In the opened popup screen fill the "Activity Name", then drag the required Activity Dialogs from the "Available Activity Dialogs" pool, and drop them into to the "Assigned Activity Dialogs" pool. This dialogs will be presented (in the ticket zoom screen) in the same order as it is defined on this screen translating from top to bottom, from left to right.
This order is specially important in the first Activity, since the first Activity Dialog for this activity is the only one that is presented when the process starts.
Erstellen Sie die folgenden Aktivitäten:
"Aufnahme der Nachfrage" (A1)
Beinhaltet die Aktivität "Aufnahme der Nachfrage" (AD1)
"Genehmigung" (A2)
Beinhaltet die Aktivitäsdialoge "Genehmigung verweigert" (AD2) und "Genehmigt" (AD3)
"Bestellung" (A3)
Beinhaltet die Aktivitätsdialoge "Bestellung abgelehnt" (AD4) und "Bestellung aufgegeben" (AD5)
Eingehend (A4)
Beinhaltet den Aktivitätsdialog "Bestellung erhalten" (AD6)
"Prozess beendet" (A5): Das ist eine Aktivität ohne mögliche Aktivitätsdialoge. Sie wird nach "Genehmigung verweigert", "Genehmigt", "Bestellung abgelehnt", "Bestellung aufgegeben" oder "Bestellung erhalten" angezeigt und stellt das Ende des Prozesses dar.
Now we can clearly see that Activities are precisely defined states of a process ticket. After a successful Transition a process ticket moves from one Activity to another.
Let us conclude our example with the last missing piece in the puzzle, the Process as the a flow describer. In our case this is the whole ordering work-flow. Other processes could be office supply ordering or completely different processes.
The process has a starting point which consists of the start Activity and the start Activity Dialog. For any new book order, the start Activity Dialog (first Activity Dialog for the first Activity) is the first screen that is displayed. If this is completed and saved, the Process ticket will be created and can follow the configured work-flow.
The process also contains the directions for how the process ticket can move through the Process. Let's call this the "Path". It consists of the start Activity, one or more Transitions (possibly with Transition Actions), and other Activities.
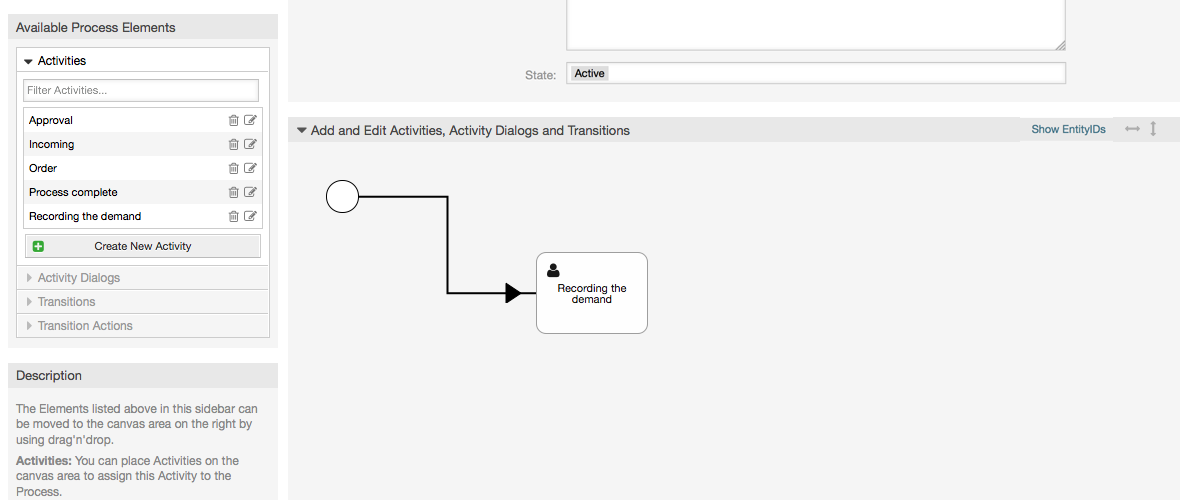
Assuming that the Activities has already assigned their Activity Dialogs drag an Activity from the accordion (in the left part of the screen) and drop it into the canvas area (below process information). Notice that an arrow from the process start (green circle) to the Activity is placed automatically. (This is the first Activity and its first Activity Dialog is the first screen that will be shown when the process starts).
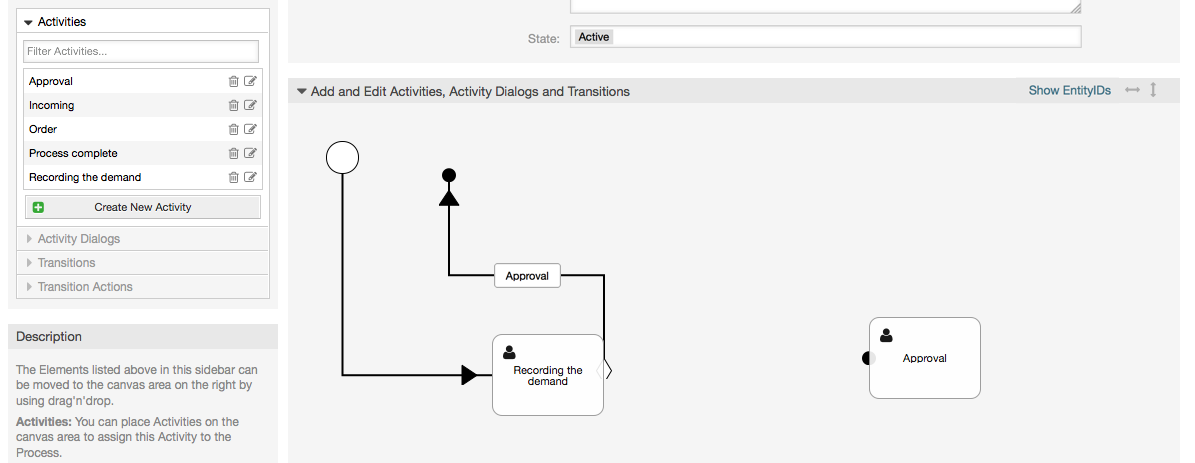
Next, drag another Activity into the canvas too. Now we will have two Activities in the canvas. The first one is connected to the start point and the second has no connections. You can hover the mouse over each activity to reveal their own Activity Dialogs.

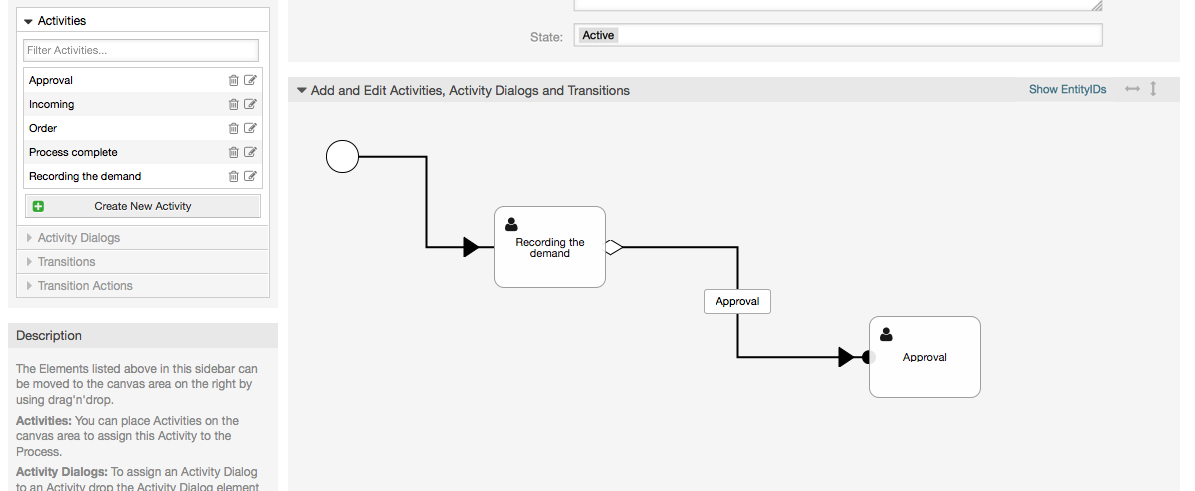
Then let's create the "Path" (connection) between this two Activities, for this we will use the Transitions. Click on Transitions in the accordion drag a Transition and drop it inside the first Activity. Notice that the Activity changes its color indicating that the Transition is attached. As soon as the Transition is dropped the end point of the Transition arrow will be placed next to the process start point. Drag the Transition arrow end point and drop it inside the other Activity to create the connection between the Activities.
Now that the "Path" between the Actions is defined, then we need to assign the Transition Actions to the Transition, double click the Transition label (in the canvas), this will open a new popup window.
Drag the needed Transition Actions from Available Transition Actions pool and drop them into the Assigned Transition Actions pool and click on submit button.
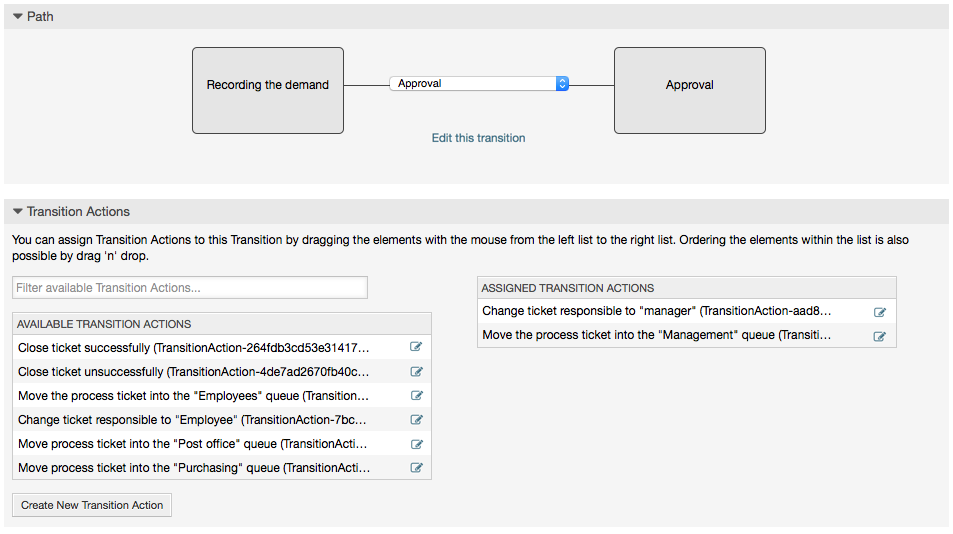
Then back in the main process edit screen click on save button below the canvas to save all other changes.
Complete the "path" adding the following Activities, Transitions and Transition Actions:
Aufnahme der Nachfrage bis zur "Approval"
Starting point: Activity: "Recording the demand" (A1)
Möglicher Übergang: "Approval" (T1)
If the condition of this activity is fulfilled, the ticket will move to Activity: "Approval" (A2)
Zusätzlich werden die folgenden Übergangs-Aktionen ausgeführt:
"Verschiebe das Prozessticket in die Management-Queue" (TA1)
"Ändere den Ticket-Verantwortlichen zu 'Manager'" (TA2)
The Activity: "Recording the demand" (A1) is a defined step of the process ticket, where there is the possibility for the Transition: "Approval" (T1). If this applies, the ticket will move to the next Activity: "Approval" (A2), and the Transition Actions: "Move the process ticket into the 'Management' queue" (TA1) and "Change ticket responsible to 'manager'" (TA2) are executed. In the Activity: "Approval" (A2), the Activity Dialogs: "Approval denied" (AD2) and "Approved" (AD3) are available.
Genehmigung
Startpunkt: Aktivität "Approval" (A2)
Mögliche Übergänge:
"Genehmigung verweigert" (T2)
If this matches, the process ticket will move to Activity: "Process complete" (A5).
Zusätzlich werden die folgenden Übergangs-Aktionen ausgeführt:
"Move process ticket into the 'Employees' queue" (TA3)
Ändere den Ticket-Verantwortlichen zu 'Employee'" (TA4)
Ticket erfolglos schließen" (TA8)
"Genehmigt" (T3)
Wenn dies zutrifft, wird das Ticket in die Aktivität: "Order" (A3) geschoben.
Zusätzlich werden die folgenden Übergangs-Aktionen ausgeführt:
"Verschiebe das Prozessticket in die 'Purchasing'-Queue" (TA5)
We can see that from the current Activity, which defines a step of the process ticket, there are one or more possibilities for Transition which have exactly one target Activity (and possibly one or more Transition Actions).
Auftrag
Startpunkt: Aktivität "Order" (A3)
Mögliche Übergänge:
"Bestellung abgelehnt" (T4)
If this matches, the process ticket will move to Activity: "Process complete" (A5).
Zusätzlich werden die folgenden Übergangs-Aktionen ausgeführt:
"Move process ticket into the 'Employees' queue" (TA3)
"Setze den Ticketverantwortlichen auf 'Employee'" (TA4)
Ticket erfolglos schließen" (TA8)
"Bestellung aufgegeben" (T5)
If this matches, the process ticket will move to Activity: "Incoming" (A4).
Zusätzlich werden die folgenden Übergangs-Aktionen ausgeführt:
"Verschiebe das Prozessticket in die 'Post office'-Queue" (TA6)
Eingehend
Startpunkt: Aktivität "Incoming" (A4)
Mögliche Übergänge:
"Sendung empfangen" (T6)
If this matches, the process ticket will move to Activity: "Process complete" (A5).
Zusätzlich werden die folgenden Übergangs-Aktionen ausgeführt:
"Move process ticket into the 'Employees' queue" (TA3)
"Setze den Ticketverantwortlichen auf 'Employee'" (TA4)
"Ticket erfolgreich schließen" (TA7)
Der komplette Pfad für den Buchbestellprozess schaut wie folgt aus:
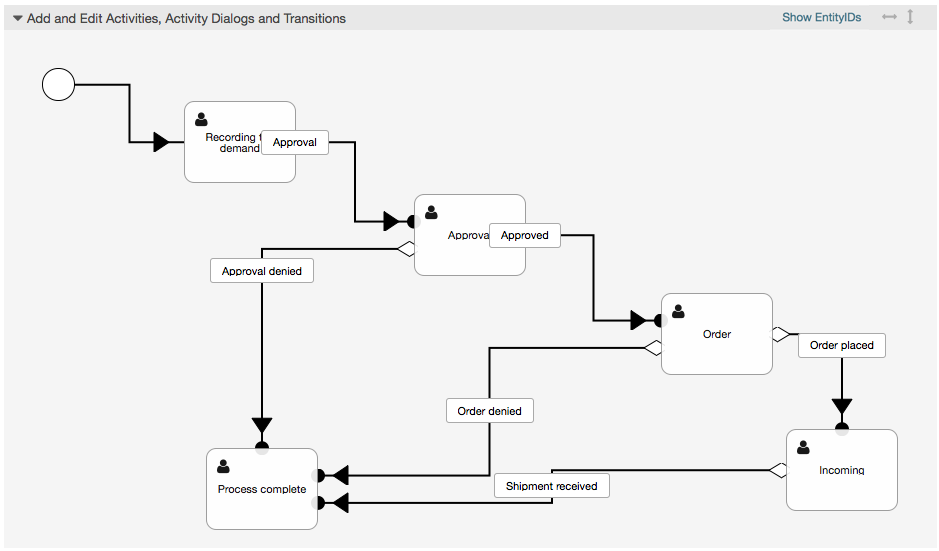
After you finish the process path please click on "Save" button in the lower part of the canvas and then click on "Synchronize All Processes" button. This will gather all processes information form the Database and create a cache file (in Perl language). This cache file is actually the processes configuration that the system will use to create or use process tickets.
Any change that is made of the process (in the GUI) will require to re-synchronize the cache file in order to get the change reflected in the system.
It is also possible to import the whole process from a YAML file, but it is still necessary to create all Dynamic Fields, Users, Queues, etc that are needed by each process before the import.
Notice that if the process requires the use of ACLs those are also needed to be set manually.
Im folgenden sehen Sie die komplette YAML-Datei für den Buchbestellprozess:
---
Activities:
  A1:
    ActivityDialogs:
      - AD1
    ChangeTime: 2012-11-23 14:49:22
    Config:
      ActivityDialog:
        1: AD1
    CreateTime: 2012-11-23 11:49:38
    EntityID: A1
    ID: 151
    Name: Recording the demand
  A2:
    ActivityDialogs:
      - AD2
      - AD3
    ChangeTime: 2012-12-13 00:55:12
    Config:
      ActivityDialog:
        1: AD2
        2: AD3
    CreateTime: 2012-11-23 11:50:11
    EntityID: A2
    ID: 152
    Name: Approval
  A3:
    ActivityDialogs:
      - AD4
      - AD5
    ChangeTime: 2012-11-23 18:12:14
    Config:
      ActivityDialog:
        1: AD4
        2: AD5
    CreateTime: 2012-11-23 11:50:35
    EntityID: A3
    ID: 153
    Name: Order
  A4:
    ActivityDialogs:
      - AD6
    ChangeTime: 2012-11-23 18:12:35
    Config:
      ActivityDialog:
        1: AD6
    CreateTime: 2012-11-23 11:51:00
    EntityID: A4
    ID: 154
    Name: Incoming
  A5:
    ActivityDialogs: []
    ChangeTime: 2012-11-23 11:51:33
    Config: {}
    CreateTime: 2012-11-23 11:51:33
    EntityID: A5
    ID: 155
    Name: Process complete
ActivityDialogs:
  AD1:
    ChangeTime: 2012-12-06 02:16:21
    Config:
      DescriptionLong: ''
      DescriptionShort: Recoding the demand
      FieldOrder:
        - DynamicField_Author
        - DynamicField_ISBN
        - DynamicField_Title
        - DynamicField_Status
      Fields:
        DynamicField_Author:
          DefaultValue: ''
          DescriptionLong: ''
          DescriptionShort: ''
          Display: 1
        DynamicField_ISBN:
          DefaultValue: ''
          DescriptionLong: ''
          DescriptionShort: ''
          Display: 1
        DynamicField_Status:
          DefaultValue: ''
          DescriptionLong: ''
          DescriptionShort: ''
          Display: 1
        DynamicField_Title:
          DefaultValue: ''
          DescriptionLong: ''
          DescriptionShort: ''
          Display: 1
      Interface:
        - AgentInterface
      Permission: ''
      RequiredLock: 0
      SubmitAdviceText: ''
      SubmitButtonText: ''
    CreateTime: 2012-11-23 14:34:43
    EntityID: AD1
    ID: 154
    Name: Recording the demand
  AD2:
    ChangeTime: 2012-11-23 14:57:41
    Config:
      DescriptionLong: ''
      DescriptionShort: Approval denied
      FieldOrder:
        - Article
        - DynamicField_Status
      Fields:
        Article:
          Config:
            CommunicationChannel:  'Internal'
            IsVisibleForCustomer: '0'
          DefaultValue: ''
          DescriptionLong: ''
          DescriptionShort: ''
          Display: 1
        DynamicField_Status:
          DefaultValue: ''
          DescriptionLong: ''
          DescriptionShort: ''
          Display: 1
      Interface:
        - AgentInterface
      Permission: ''
      RequiredLock: 0
      SubmitAdviceText: ''
      SubmitButtonText: Deny Request
    CreateTime: 2012-11-23 14:36:39
    EntityID: AD2
    ID: 155
    Name: Approval denied
  AD3:
    ChangeTime: 2012-12-14 03:14:23
    Config:
      DescriptionLong: ''
      DescriptionShort: Approved
      FieldOrder:
        - DynamicField_Status
      Fields:
        DynamicField_Status:
          DefaultValue: ''
          DescriptionLong: ''
          DescriptionShort: ''
          Display: 1
      Interface:
        - AgentInterface
      Permission: ''
      RequiredLock: 0
      SubmitAdviceText: ''
      SubmitButtonText: Approve Request
    CreateTime: 2012-11-23 14:37:35
    EntityID: AD3
    ID: 156
    Name: Approved
  AD4:
    ChangeTime: 2012-11-23 14:58:52
    Config:
      DescriptionLong: ''
      DescriptionShort: Order rejected
      FieldOrder:
        - Article
        - DynamicField_Status
      Fields:
        Article:
          Config:
            CommunicationChannel:  'Internal'
            IsVisibleForCustomer: '0'
          DefaultValue: ''
          DescriptionLong: ''
          DescriptionShort: ''
          Display: 1
        DynamicField_Status:
          DefaultValue: ''
          DescriptionLong: ''
          DescriptionShort: ''
          Display: 1
      Interface:
        - AgentInterface
      Permission: ''
      RequiredLock: 0
      SubmitAdviceText: ''
      SubmitButtonText: Reject Order
    CreateTime: 2012-11-23 14:38:48
    EntityID: AD4
    ID: 157
    Name: Order rejected
  AD5:
    ChangeTime: 2012-12-06 02:20:12
    Config:
      DescriptionLong: ''
      DescriptionShort: Order placed
      FieldOrder:
        - DynamicField_DeliveryDate
        - DynamicField_Price
        - DynamicField_Supplier
        - DynamicField_Status
      Fields:
        DynamicField_DeliveryDate:
          DefaultValue: ''
          DescriptionLong: ''
          DescriptionShort: ''
          Display: 1
        DynamicField_Price:
          DefaultValue: ''
          DescriptionLong: ''
          DescriptionShort: ''
          Display: 1
        DynamicField_Status:
          DefaultValue: ''
          DescriptionLong: ''
          DescriptionShort: ''
          Display: 1
        DynamicField_Supplier:
          DefaultValue: ''
          DescriptionLong: ''
          DescriptionShort: ''
          Display: 1
      Interface:
        - AgentInterface
      Permission: ''
      RequiredLock: 0
      SubmitAdviceText: ''
      SubmitButtonText: Place Order
    CreateTime: 2012-11-23 14:41:28
    EntityID: AD5
    ID: 158
    Name: Order placed
  AD6:
    ChangeTime: 2012-11-23 14:42:43
    Config:
      DescriptionLong: ''
      DescriptionShort: Shipment received
      FieldOrder:
        - DynamicField_DateOfReceipt
        - DynamicField_Status
      Fields:
        DynamicField_DateOfReceipt:
          DefaultValue: ''
          DescriptionLong: ''
          DescriptionShort: ''
          Display: 1
        DynamicField_Status:
          DefaultValue: ''
          DescriptionLong: ''
          DescriptionShort: ''
          Display: 1
      Interface:
        - AgentInterface
      Permission: ''
      RequiredLock: 0
      SubmitAdviceText: ''
      SubmitButtonText: ''
    CreateTime: 2012-11-23 14:42:43
    EntityID: AD6
    ID: 159
    Name: Shipment received
Process:
  Activities:
    - A1
    - A2
    - A3
    - A4
    - A5
  ChangeTime: 2012-12-06 02:31:59
  Config:
    Description: The process to order a book
    Path:
      A1:
        T1:
          ActivityEntityID: A2
          TransitionAction:
            - TA2
            - TA1
      A2:
        T2:
          ActivityEntityID: A5
          TransitionAction:
            - TA3
            - TA4
            - TA8
        T3:
          ActivityEntityID: A3
          TransitionAction:
            - TA5
      A3:
        T4:
          ActivityEntityID: A5
          TransitionAction:
            - TA3
            - TA4
            - TA8
        T5:
          ActivityEntityID: A4
          TransitionAction:
            - TA6
      A4:
        T6:
          ActivityEntityID: A5
          TransitionAction:
            - TA3
            - TA4
            - TA7
      A5: {}
    StartActivity: A1
    StartActivityDialog: AD1
  CreateTime: 2012-11-23 11:45:12
  EntityID: P1
  ID: 94
  Layout:
    A1:
      left: 172
      top: 63
    A2:
      left: 402
      top: 156
    A3:
      left: 649
      top: 255
    A4:
      left: 774
      top: 391
    A5:
      left: 194
      top: 410
  Name: Book ordering
  State: Active
  StateEntityID: S1
  TransitionActions:
    - TA1
    - TA2
    - TA3
    - TA4
    - TA8
    - TA5
    - TA3
    - TA4
    - TA8
    - TA6
    - TA3
    - TA4
    - TA7
  Transitions:
    - T1
    - T2
    - T3
    - T4
    - T5
    - T6
TransitionActions:
  TA1:
    ChangeTime: 2012-11-23 16:01:37
    Config:
      Config:
        Queue: Management
      Module: Kernel::System::ProcessManagement::TransitionAction::TicketQueueSet
    CreateTime: 2012-11-23 15:50:59
    EntityID: TA1
    ID: 61
    Name: Move the process ticket into the "Management" queue
  TA2:
    ChangeTime: 2012-11-23 16:02:12
    Config:
      Config:
        Responsible: manager
      Module: Kernel::System::ProcessManagement::TransitionAction::TicketResponsibleSet
    CreateTime: 2012-11-23 15:58:22
    EntityID: TA2
    ID: 62
    Name: Change ticket responsible to "manager"
  TA3:
    ChangeTime: 2012-11-24 14:27:02
    Config:
      Config:
        Queue: Employees
      Module: Kernel::System::ProcessManagement::TransitionAction::TicketQueueSet
    CreateTime: 2012-11-23 16:02:54
    EntityID: TA3
    ID: 63
    Name: Move the process ticket into the "Employees" queue
  TA4:
    ChangeTime: 2012-11-23 16:04:06
    Config:
      Config:
        Responsible: Employee
      Module: Kernel::System::ProcessManagement::TransitionAction::TicketResponsibleSet
    CreateTime: 2012-11-23 16:04:06
    EntityID: TA4
    ID: 64
    Name: Change ticket responsible to "Employee"
  TA5:
    ChangeTime: 2012-12-06 02:18:34
    Config:
      Config:
        Queue: Purchasing
      Module: Kernel::System::ProcessManagement::TransitionAction::TicketQueueSet
    CreateTime: 2012-11-23 16:04:54
    EntityID: TA5
    ID: 65
    Name: Move process ticket into the "Purchasing" queue
  TA6:
    ChangeTime: 2012-12-06 02:18:48
    Config:
      Config:
        Queue: Post office
      Module: Kernel::System::ProcessManagement::TransitionAction::TicketQueueSet
    CreateTime: 2012-11-23 16:06:20
    EntityID: TA6
    ID: 66
    Name: Move process ticket into the "Post office" queue
  TA7:
    ChangeTime: 2012-12-06 02:29:55
    Config:
      Config:
        State: closed successful
      Module: Kernel::System::ProcessManagement::TransitionAction::TicketStateSet
    CreateTime: 2012-12-06 02:29:27
    EntityID: TA7
    ID: 67
    Name: Close ticket successfully
  TA8:
    ChangeTime: 2012-12-06 02:31:12
    Config:
      Config:
        State: closed unsuccessful
      Module: Kernel::System::ProcessManagement::TransitionAction::TicketStateSet
    CreateTime: 2012-12-06 02:31:12
    EntityID: TA8
    ID: 68
    Name: Close ticket unsuccessfully
Transitions:
  T1:
    ChangeTime: 2012-11-23 15:12:20
    Config:
      Condition:
        1:
          Fields:
            DynamicField_Status:
              Match: Approval
              Type: String
          Type: and
      ConditionLinking: and
    CreateTime: 2012-11-23 11:53:52
    EntityID: T1
    ID: 94
    Name: Approval
  T2:
    ChangeTime: 2012-11-23 15:12:50
    Config:
      Condition:
        1:
          Fields:
            DynamicField_Status:
              Match: Approval denied
              Type: String
          Type: and
      ConditionLinking: and
    CreateTime: 2012-11-23 11:54:26
    EntityID: T2
    ID: 95
    Name: Approval denied
  T3:
    ChangeTime: 2012-11-23 15:13:29
    Config:
      Condition:
        1:
          Fields:
            DynamicField_Status:
              Match: Approved
              Type: String
          Type: and
      ConditionLinking: and
    CreateTime: 2012-11-23 11:54:54
    EntityID: T3
    ID: 96
    Name: Approved
  T4:
    ChangeTime: 2012-11-23 15:14:08
    Config:
      Condition:
        1:
          Fields:
            DynamicField_Status:
              Match: Order denied
              Type: String
          Type: and
      ConditionLinking: and
    CreateTime: 2012-11-23 11:55:25
    EntityID: T4
    ID: 97
    Name: Order denied
  T5:
    ChangeTime: 2012-11-23 18:30:33
    Config:
      Condition:
        1:
          Fields:
            DynamicField_Status:
              Match: Order placed
              Type: String
          Type: and
      ConditionLinking: and
    CreateTime: 2012-11-23 11:56:15
    EntityID: T5
    ID: 98
    Name: Order placed
  T6:
    ChangeTime: 2012-11-23 15:15:30
    Config:
      Condition:
        1:
          Fields:
            DynamicField_Status:
              Match: Shipment received
              Type: String
          Type: and
      ConditionLinking: and
    CreateTime: 2012-11-23 11:56:48
    EntityID: T6
    ID: 99
    Name: Shipment received
Ein Prozess modelliert den Pfad eines Workflows/Prozess. Die Wegpunkte auf diesem Pfad können Aktivitäten oder Übergänge sein. Auf diese wird später noch genauer eingegangen.
The Process configuration can be done in the file
Kernel/Config.pm but it is strongly recommended to
create new files like
Kernel/Config/Files/MyProcess.pm. Notice that the GUI
generates the file
Kernel/Config/File/ZZZProcessManagement please avoid to
use that filename, otherwise it will be overwritten when you sync
processes. Let's see an example process configuration (from process cache
file):
$Self->{'Process'} = {
'P1' => {
Name => 'Book order',
CreateTime => '16-02-2012 13:37:00',
CreateBy => '1',
ChangeTime => '17-02-2012 13:37:00',
ChangeBy => '1',
State => 'Active',
StartActivity => 'A1',
StartActivityDialog => 'AD1',
Path => {
'A1' => {
'T1' => {
ActivityEntityID => 'A2',
},
},
'A2' => {
'T2' => {
ActivityEntityID => 'A3',
},
},
},
},
'P2' => {
Name => 'IT order',
CreateTime => '26-02-2012 13:37:00',
CreateBy => '1',
ChangeTime => '27-02-2012 13:37:00',
ChangeBy => '1',
State => 'Active',
StartActivity => 'A2',
StartActivityDialog => 'AD2',
Path => {
'A2' => {
'T3' => {
ActivityEntityID => 'A4',
},
},
},
}
};
Der Name des Prozesses, dieser kann vom Agenten ausgewählt werden, wenn ein neues Prozessticket erstellt wird.
Definiert den Status eines Prozesses. Möglich Werte sind:
'Active' sind alle Prozesse, welche in neuen Prozesstickets genutzt werden können.
'FadeAway' sind Prozesse, welche nicht mehr für neue Tickets genutzt werden können, aber bereits existierende Tickets können diesen Prozess immer noch ausführen.
'Inactive' Prozesse sind deaktiviert und können nicht neue und bereits existierende Tickets genutzt werden.
Wenn ein neues Prozessticket erstellt wird, muss eine Startaktivität definiert werden. Sobald das Ticket erstellt wurde, wird diese Aktivität gesetzt und als Basis für die erste Prüfung des Übergangs genutzt.
Für neue Prozesstickets muss ein StartActivityDialog definiert werden. Dieser wird angezeigt, wenn ein neues Prozessticket erstellt wird (nachdem der Prozess ausgewählt wurde). Das Ticket existiert noch nicht, wird aber nach Übermittlung des StartActivityDialog erstellt.
Der Pfad beinhaltet die aktuelle Prozessstruktur der Aktivitäten und möglichen Übergänge zwischen ihnen.
'A1' => {
'T1' => {
ActivityEntityID => 'A2',
},
'T2' => {
ActivityEntityID => 'A3',
},
'T3' => {
ActivityEntityID => 'A4',
TransitionAction => ['TA1', 'TA2'],
},
},
If a process ticket is in Activity A1, it has three
possible ways to get to another Activity. In the Transitions
T1 to T3, conditions are defined, that
a process ticket must fulfill to move (transit) to another Activity.
If in this case all the values of the process ticket and its dynamic fields
that are needed for the Transition T2 are correct, the
ticket will be moved from Activity A1 to
A3. After an ActivityDialog is submitted, or any other
change is made to a ticket, it will be checked for possible Transitions from
the current Activity. If multiple Transitions are possible, the first one
will be used (based on numerical sorting of the TransitionIDs).
Additionally, it is possible to assign Transition Actions to Transitions in the Path configuration. These are modules which are executed after a successful Transition. They have to be specified in array form as in the example, we'll talk about the details later.
An Activity contains one or more Activity Dialogs and models a
step in the process. All Activity Dialogs of the current
Activity are displayed in the ticket zoom and can be used until the
conditions of a Transition are fulfilled.
Hier sehen Sie eine Beispiel Aktivitätskonfiguration:
$Self->{'Process::Activity'} =
{
'A1' => {
Name => 'Activity 1 optional',
CreateTime => '16-02-2012 13:37:00',
CreateBy => '1',
ChangeTime => '17-02-2012 13:37:00',
ChangeBy => '1',
ActivityDialog => {
1 => 'AD1',
},
},
'A2' => {
Name => 'Activity 2 optional',
CreateTime => '16-02-2012 13:37:00',
CreateBy => '1',
ChangeTime => '17-02-2012 13:37:00',
ChangeBy => '1',
ActivityDialog => {
1 => 'AD5',
2 => 'AD6',
3 => 'AD1',
},
},
};
Ein Aktivitätsdialog ist eine besondere Oberfläche und kann in verschiedenen Aktivitäten wiederverwendet werden.
Hier sehen Sie eine Beispiel Konfiguration:
$Self->{'Process::ActivityDialog'} = {
    'AD1' => {
        Name             => 'ActivityDialog 1 optional',
        DescriptionShort => 'Basic info',
        DescriptionLong  => 'Please insert the necessesary basic information for IT orders',
        CreateTime       => '28-02-2012 13:37:00',
        CreateBy         => '1',
        ChangeTime       => '29-02-2012 13:37:00',
        ChangeBy         => '1',
        Fields => {
            PriorityID => {
                DescriptionShort => 'Priority ID',
                DescriptionLong  => 'Enter the priority here',
                Display          => 2,
            },
        },
        FieldOrder       => [ 'PriorityID' ],
        SubmitAdviceText => 'Note: If you submit the form...',
        SubmitButtonText => 'Send request',
    },
    'AD2' => {
        Name             => 'ActivityDialog 2 optional',
        DescriptionShort => 'Basic info',
        DescriptionLong  => 'Please insert the necessesary basic information for Book orders',
        CreateTime       => '28-02-2012 13:37:00',
        CreateBy         => '1',
        ChangeTime       => '29-02-2012 13:37:00',
        ChangeBy         => '1',
        Fields => {
            StateID => {
                DescriptionShort => 'State ID',
                DescriptionLong  => 'Enter the state here',
                Display          => 2,
                DefaultValue     => '2',
            },
            Queue => {
                DescriptionShort => 'Queue ID',
                DescriptionLong  => 'Enter the queue here',
                Display          => 2,
                DefaultValue     => 'Raw',
            },
            Title => {
                DescriptionShort => 'Title',
                DescriptionLong  => 'Enter the title here',
                Display          => 1,
                DefaultValue     => 'Default Title',
            },
            DynamicField_Anzahl => {
                DescriptionShort => 'Amount',
                DescriptionLong  => 'Enter the amount here',
                Display          => 2,
                DefaultValue     => '4',
            },
        },
        FieldOrder       => [ 'DynamicField_Anzahl', 'StateID', 'Queue', 'Title' ],
        SubmitAdviceText => 'Note: If you submit the form...',
        SubmitButtonText => 'Send request',
    },
};
Beinhaltet alle Felder, welche in diesem Aktivitätsdialog angezeigt werden können. Die folgenden Felder können zurzeit benutzt werden:
Title
State
StateID
Priority
PriorityID
Lock
LockID
Queue
QueueID
Customer
CustomerID
CustomerNo
CustomerUserID
Owner
OwnerID
Type
TypeID
SLA
SLAID
Service
ServiceID
Responsible
ResponsibleID
PendingTime
DynamicField_$FieldName # for all dynamic fields
Beispielkonfiguration eines einfachen Feldes:
StateID => {
DescriptionShort => 'State ID',
DescriptionLong => 'Enter the state here',
Display => 2,
DefaultValue => '2',
},
The field Article is a special case. If it is present in
a Fields configuration, the Activity Dialog will contain
a complete Richtext editor with subject field and attachment handling. The
entered text will then be added to the ticket as an article. Let's see an
example Article field configuration:
Article => {
    DescriptionShort => 'Please insert your comment here.',
    DescriptionLong => '',
    Display         => 1,
    Config          => {
        CommunicationChannel => 'Internal'
        IsVisibleForCustomer => '0'
        LabelSubject => '',
        LabelBody    => '',
    },
},
Werfen wir einen Blick auf die Optionen der Konfigurationsfelder:
Optionale längere Beschreibung, welche bei MouseOver über dem Feld angezeigt wird. Zum Beispiel Hinweise, wie das Feld ausgefüllt werden soll.
Steuert, ob das Feld angezeigt und/oder verpflichtend ist. Möglich Werte:
0: field is invisible. This can be helpful if field values should automatically be set. The configuredDefaultValuewill be stored in this case.1: field is visible, but optional.2: field is visible and mandatory. The following fields can only be invisible or mandatory:QueueID Queue State StateID Lock LockID Priority PriorityID Type TypeID
Wenn Felder als optional konfiguriert sind und kein Wert vom Benutzer eingegeben wurde, wird der Standard-Wert übernommen, wenn der Aktivitätsdialog vom Benutzer übermittelt wurde.
For fields with ID (like QueueID, OwnerID), this refers
to the database ID of the value. For other fields without
ID (like Queue, Owner), the
DefaultValue must contain the value itself. Example:
Queue => {
DescriptionShort => 'Queue',
DescriptionLong => 'Hier die Queue eingeben',
Display => 2,
DefaultValue => 'Raw',
},
Here the display order of the fields is configured. IMPORTANT: Invisible fields also must be configured here, because only configured fields will be considered when saving. Fields which are not configured will not be saved.
Optionaler Text, der direkt über der Übermitteln-Schaltfläche angezeigt wird und zusätzliche Hilfestellungen oder Ratschläge gibt.
Ein Übergang entscheidet - basierend auf konfigurierbaren Bedingungen - welchen Pfad der Prozess nimmt, zum Beispiel zu welcher Aktivität das Prozessticket spring.
Hier sehen Sie ein Beispiel:
$Self->{'Process::Transition'} = {
    'T1' => {
        Name => 'Transition 1',
        CreateTime => '14-03-2012 13:37:00', # optional
        CreateBy   => '1',                   # optional
        ChangeTime => '15-03-2012 13:37:00', # optional
        ChangeBy   => '15-03-2012 13:37:00', # optional
        Condition  => {
            Cond1  => {
                Fields => {
                    StateID => {
                        Type  => 'String',
                        Match => '1',
                    },
                },
            },
        },
    },
    'T2' => {
        Name       => 'Transition 2 optional',
        CreateTime => 'DATE',   # optional
        CreateBy   => 'USERID', # optional
        ChangeTime => 'DATE',   # optional
        ChangeBy => 'USERID',   # optional
        Condition => {
            Cond1 => {
                Queue               => 'Raw',
                DynamicField_Farbe  => '2',
                DynamicField_Anzahl => '1',
            },
        },
    },
};
Beinhaltet alle Bedingungen, die notwendig sind, damit der Übergang wirksam ist. Beispiel:
Condition => {
    Type  => 'and',
    Cond1 => {
        Type   => 'and',
        Fields => {
            StateID => {
                Type  => 'String',
                Match => '1',
            },
            DynamicField_Marke => {
                Type  => 'String',
                Match => 'VW',
        },
    },
    Cond2 => {
        Type => 'and',
        Fields => {
            Queue => {
                Type  => 'String',
                Match => 'Raw',
            },
        },
    },
},
Werfen wir einen Blick auf den Zustand der Konfiguration im Detail.
Specifies the way the different condition elements are connected to each other. Possible values:
and: This is the default. All conditions must be met for the transition to take effect.or: At least one condition must match.xor: Exactly one condition must match, not more.
This is the name of an example condition. It can be freely chosen. Conditions are evaluated in sorted order.
Specifies the way how the individual field tests of this condition are connected to each other. Possible values:
and: This is the default. All field tests must match for this condition to match.or: At least one field test must match.xor: Exactly one field test must match, not more.
Specifies the particular fields whose values should be tested. From our example:
Fields => {
StateID => {
Type => 'String',
Match => '1',
},
Example of a field name. The following ticket fields can be used:
    Title
    State
    StateID
    Priority
    PriorityID
    Lock
    LockID
    Queue
    QueueID
    Customer
    CustomerID
    CustomerNo
    CustomerUserID
    Owner
    OwnerID
    Type
    TypeID
    SLA
    SLAID
    Service
    ServiceID
    Responsible
    ResponsibleID
    DynamicField_$FieldName # for all DynamicFields
Beim Testen eines Feldes mit "ID" (wie SLAID), wird die Datenbank-ID des Feldes für die Prüfung verwendet werden, für andere Bereiche (wie SLA) wird der Ist-Wert für den Test verwendet.
Bestimmt die Art der Feldtests. Mögliche Werte:
String: Compares the field value with the string specified inMatch. Matches if they are exactly the same.Hash: Compares the field value (hash) with the hash specified inMatch. All hash values must be the same.Array: Compares the field value (array) with the array specified inMatch. Both lists must be the same.Regex: The field value can be tested with a regular expression. It is important thatMatchcontains qr{}xms as a base condition. Between the braces the actual regular expression can be noted.Module: Allows you to use a perl module for condition checking. If it returns 1, the check was positive. You can find an example module inKernel/System/ProcessManagement/TransitionValidation/ValidateDemo.pm.
Transition Actions are actions which can be triggered after successfully applied transitions (when a process ticket moves from one activity to another). These Transition Actions can be used to perform different changes on the ticket, e. g. change the Queue or the Owner of the ticket, and you can also create your own Transition Actions to perform other complex changes.
Hier sehen Sie ein Beispiel:
$Self->{'Process::TransitionAction'} = {
    'TA1' => {
        Name   => 'Queue Move',
        Module => 'Kernel::System::ProcessManagement::TransitionAction::TicketQueueSet',
        Config => {
            Queue  => 'Junk',
            UserID => 123,
        },
    },
};
This parameter contains all settings which are required for the module. Its content depends on the particular Transition Action module which is used. Please see the documentation of the individual modules for details. In our example, only the Queue must be specified. Nevertheless we are also sending UserID parameter, by using the UserID parameter. The transition action will be executed impersonating the user with the given UserID.
The use of UserID inside the Config parameter of a
Transition Action is accepted by all Transition Actions (since OTRS
3.2.4). In this example it could be particularly important if the user that
triggers the Transition does not have permissions to move the ticket to the
queue Junk, while the user with the UserID 123 might
have.
To use Transition Action modules multiple times, just specify several Transition Actions in your configuration. Example:
    $Self->{'Process::TransitionAction'} = {
        'TA1' => {
            Name   => 'Queue Move Junk',
            Module => 'Kernel::System::ProcessManagement::TransitionAction::TicketQueueSet',
            Config => {
                Queue => 'Junk',
            },
        },
        'TA2' => {
            Name   => 'Queue Move Raw',
            Module => 'Kernel::System::ProcessManagement::TransitionAction::TicketQueueSet',
            Config => {
                Queue => 'Raw',
            },
        },
    };
Here the same module is used to move a process ticket into the
Raw queue, and another time to move it into the junk
queue. The Transition Action which must be used for a particular Transition
is determined from the Path setting of the Process
configuration.
OTRS comes with several Transition Actions that can be used in your processes. Here you can find their documentation and how they need to be configured.
Fügt eins oder mehrere dynamischen Felder an ein Prozessticket an. Beispiel:
$Self->{'Process::TransitionAction'} = {
    'TA1' => {
        Name   => 'Set DynamicField MasterSlave to Master and Approved to 1',
        Module => 'Kernel::System::ProcessManagement::TransitionAction::DynamicFieldSet',
        Config => {
            MasterSlave => 'Master',
            Approved    => '1',

        },
    },
};
Name specifies the name of the configured
TransitionAction.
MasterSlave and Approved are given as
examples of DynamicField names. The values of the fields
(Master and 1) will be set by this
TransitionAction.
Creates an article, the %DataPayload parameters depends on the given
communication channel, by default Internal is
used. Example:
$Self->{'Process::TransitionAction'} = {
    'TA1' => {
        Name   => 'Article Create Note',
        Module => 'Kernel::System::ProcessManagement::TransitionAction::TicketArticleCreate',
        Config => {

        Config                   => {
            SenderType           => 'agent',            # (required) agent|system|customer
            IsVisibleForCustomer => 1,                  # 0 or 1
            CommunicationChannel => 'Internal',         # Internal|Phone|Email|..., default: Internal

            %DataPayload,                               # some parameters depending of each communication channel
        },
    },
};
The following is the %DataPayload for MIME based Communication channels
(Email,Internal and
Phone).
            SenderType       => 'agent',                                                # agent|system|customer
            ContentType      => 'text/plain; charset=ISO-8859-15',                      # or optional Charset & MimeType (e.g. 'text/html; charset=UTF-8')
            Subject          => 'some short description',                               # required
            Body             => 'the message text',                                     # required
            HistoryType      => 'OwnerUpdate',                                          # EmailCustomer|Move|AddNote|PriorityUpdate|WebRequestCustomer|...
            HistoryComment   => 'Some free text!',
            From             => 'Some Agent <email@example.com>',                       # not required but useful
            To               => 'Some Customer A <customer-a@example.com>',             # not required but useful
            Cc               => 'Some Customer B <customer-b@example.com>',             # not required but useful
            ReplyTo          => 'Some Customer B <customer-b@example.com>',             # not required
            InReplyTo        => '<asdasdasd.12@example.com>',                           # not required but useful
            References       => '<asdasdasd.1@example.com> <asdasdasd.12@example.com>', # not required but useful
            NoAgentNotify    => 0,                                                      # if you don't want to send agent notifications
            AutoResponseType => 'auto reply',                                           # auto reject|auto follow up|auto reply/new ticket|auto remove

            ForceNotificationToUserID   => '1,43,56',                                    # if you want to force somebody
            ExcludeNotificationToUserID => '43,56',
                 # if you want full exclude somebody from notifications,
                 # will also be removed in To: line of article,
                 # higher prio as ForceNotificationToUserID
            ExcludeMuteNotificationToUserID => '43,56',
                 # the same as ExcludeNotificationToUserID but only the
                 # sending gets muted, agent will still shown in To:
                 # line of article
Name specifies the name of the configured
TransitionAction. It can be freely chosen, but should reflect the purpose of
the configured action.
SenderType defines the sender type of the
article. Possible values: agent, system, customer.
IsVisibleForCustomer defines if the article should be
displayed in the customer interface.
CommunicationChannel defines the type of the article to
be created. Possible values: Email,
Internal and Phone. This list could be
extended by installing new communication channels via an OTRS Package.
ContentType defines the content type of the
article. Possible values: text/plain; charset=ISO-8859-15
or any other valid charset and mime type.
Subject defines the article title. Mandatory.
Body defines the article content. Mandatory.
HistoryType defines the type of the history
entry. Possible values: AddNote, ArchiveFlagUpdate, Bounce, CustomerUpdate,
EmailAgent, EmailCustomer, EscalationResponseTimeNotifyBefore,
EscalationResponseTimeStart, EscalationResponseTimeStop,
EscalationSolutionTimeNotifyBefore, EscalationSolutionTimeStart,
EscalationSolutionTimeStop, EscalationUpdateTimeNotifyBefore,
EscalationUpdateTimeStart, EscalationUpdateTimeStop, FollowUp, Forward,
Lock, LoopProtection, Merged, Misc, Move, NewTicket, OwnerUpdate,
PhoneCallAgent, PhoneCallCustomer, PriorityUpdate, Remove,
ResponsibleUpdate, SendAgentNotification, SendAnswer, SendAutoFollowUp,
SendAutoReject, SendAutoReply, SendCustomerNotification, ServiceUpdate,
SetPendingTime, SLAUpdate, StateUpdate, Subscribe, SystemRequest,
TicketDynamicFieldUpdate, TicketLinkAdd, TicketLinkDelete, TimeAccounting,
TypeUpdate, Unlock, Unsubscribe, WebRequestCustomer.
HistoryComment defines the content of the history entry.
From, To, Cc and
ReplyTo take email addresses in the notation specified
above.
InReplyTo and References take email
message IDs.
NoAgentNotify - if set to 1, the email notification of
the Agent will not be sent.
AutoResponseType can take the following values: auto
follow up, auto reject, auto remove, auto reply, auto reply/new ticket.
ForceNotificationToUserID,
ExcludeNotificationToUserID,
ExcludeMuteNotificationToUserID can take a list of
UserIDs that are either always notified, not notified or listed as notified
but not actually sent a notification email.
Erstellt ein Ticket mit einem Artikel, das neue Ticket kann mit einem Prozessticket verlinkt werden. Beispiel:
$Self->{'Process::TransitionAction'} = {
    'TA1' => {
        Name   => 'Ticket Create',
        Module => 'Kernel::System::ProcessManagement::TransitionAction::TicketCreate',
        Config => {

            # ticket required:
            Title         => 'Some Ticket Title',
            Queue         => 'Raw',              # or QueueID => 123,
            Lock          => 'unlock',
            Priority      => '3 normal',         # or PriorityID => 2,
            State         => 'new',              # or StateID => 5,
            CustomerID    => '123465',
            CustomerUser  => 'customer@example.com',
            OwnerID       => 'someuserlogin',    # or OwnerID => 123,

            # ticket optional:
            TN              => $TicketObject->TicketCreateNumber(), # optional
            Type            => 'Incident',            # or TypeID => 1, not required
            Service         => 'Service A',           # or ServiceID => 1, not required
            SLA             => 'SLA A',               # or SLAID => 1, not required
            ResponsibleID   => 123,                   # not required
            ArchiveFlag     => 'y',                   # (y|n) not required
            PendingTime     => '2011-12-23 23:05:00', # optional (for pending states)
            PendingTimeDiff => 123 ,                  # optional (for pending states)

            # article required:
            SenderType           => 'agent',           # agent|system|customer
            CommunicationChannel => 'Internal'         # Internal|Phone|Email|..., default: Internal
            IsVisibleForCustomer => '0'

            %DataPayload,                             # some parameters depending of each communication channel

            # article optional:
            TimeUnit                        => 123

            # other:
            DynamicField_NameX => $Value,
            LinkAs => $LinkType,                                        # Normal, Parent, Child, etc. (respective original ticket)
            UserID => 123,                                              # optional, to override the UserID from the logged user
        },
    },
};
Name specifies the name of the configured
TransitionAction. It can be freely chosen, but should reflect the purpose of
the configured action.
Title The ticket title.
Queue or QueueID specifies the name or
id of the queue to be used in the new ticket.
Lock or LockID sets the lock status of
the ticket.
Priority or PriorityID specifies the
name or id of the priority to be used in the new ticket.
State or StateID specifies the name or
id of the state to be used in the new ticket.
CustomerID, the customer id to be set for the new ticket.
CustomerUser, the login of the customer that will be
assigned in the ticket.
OwnerID or OwnerID, specifies the
login or id of the agent that will be the new ticket owner.
TN, custom number for the new ticket.
Type or TypeID specifies the name or
id of the ticket type to be used in the new ticket.
Service or ServiceID specifies the
name or id of the service to be used in the new ticket.
SLA or SLAID specifies the name or id
of the SLA to be used in the new ticket.
ResponsibleID, the ID of the agent that will be the new
ticket responsible.
PendingTime, a predefined date to set the Ticket Pending
Times, when the ticket state belongs to a pending state type.
PendingTimeDiff, a dynamically date (expressed in seconds
from current date/time) to set the Ticket Pending Times, when the ticket
state belongs to a pending state type.
SenderType defines the sender type of the
article. Possible values: agent, system, customer.
IsVisibleForCustomer defines if the article should be
displayed in the customer interface.
CommunicationChannel defines the type of the article to
be created. Possible values: Email,
Internal and Phone. This list could be
extended by installing new communication channels via an OTRS Package.
Please check the additional parameters for different article channels.
TimeUnit the time invested in the current ticket article
expressed in seconds, minutes, hours, etc.
DynamicField_NameX where DynamicField_ is a required
prefix and NameX is the name of a Dynamic Field to be set in the new ticket
(on ticket level, not article levels).
LinkAs to define the new ticket relation with originator
ticket, from the new ticket point of view, for example Normal, Parent, Child
etc.
OTRS smart tags like <OTRS_CUSTOMER_BODY> or
<OTRS_CUSTOMER_REALNAME> are now supported in the
Transition Action TicketCreate. Those smart tags could
be used to create a new ticket and insert data from the process ticket to
this child ticket. The usage of the OTRS smart tags is identical to the
text templates in Ticket Notifications.
Legt den Kunden für ein Prozessticket fest. Beispiel:
$Self->{'Process::TransitionAction'} = {
'TA1' => {
Name => 'Customer Set Customer to test',
Module => 'Kernel::System::Process::TransitionAction::TicketCustomerSet',
Config => {
No => 'test',
User => 'client-user-123',
# or in other words
# CustomerID => 'client123',
# CustomerUserID => 'client-user-123',

},
},
};
Name specifies the name of the configured
TransitionAction.
No or CustomerID set the Customer ID
of the customer.
User or CustomerUserID set the
Username of the customer.
Ändert die Sperre eines Prozessticket. Beispiel:
$Self->{'Process::TransitionAction'} = {
'TA1' => {
Name => 'Set Lock to lock',
Module => 'Kernel::System::ProcessManagement::TransitionAction::TicketLockSet',
Config => {
Lock => 'lock',
# or
LockID => 2,
},
},
};
Name specifies the name of the configured
TransitionAction.
Lock defines the new lock of the process ticket.
LockID defines the internal ID of the new lock.
Ändert den Besitzer eines Prozesstickets. Beispiel:
$Self->{'Process::TransitionAction'} = {
'TA1' => {
Name => 'Owner Set root@localhost',
Module => 'Kernel::System::ProcessManagement::TransitionAction::TicketOwnerSet',
Config => {
Owner => 'root@localhost',
# or
OwnerID => 1,
},
},
};
Name specifies the name of the configured
TransitionAction.
Owner specifies the login name of the new owner.
OwnerID specifies the internal ID of the new owner.
Verschiebt das Ticket in eine Ziel-Queue. Beispiel:
$Self->{'Process::TransitionAction'} = {
'TA1' => {
Name => 'Queue Move Raw',
Module => 'Kernel::System::ProcessManagement::TransitionAction::TicketQueueSet',
Config => {
Queue => 'Raw',
# or
# QueueID => '2',
},
},
};
Name specifies the name of the configured
TransitionAction.
Queue specifies the name of the target queue.
QueueID specifies the internal ID of the target queue.
Ändert den Verantwortlichen eines Prozesstickets. Beispiel:
$Self->{'Process::TransitionAction'} = {
'TA1' => {
Name => 'Responsible Set root@localhost',
Module => 'Kernel::System::ProcessManagement::TransitionAction::TicketResponsibleSet',
Config => {
Responsible => 'root@localhost',
# or
ResponsibleID => 1,
},
},
};
Name specifies the name of the configured
TransitionAction.
Responsible specifies the login name of the new
responsible.
ResponsibleID specifies the internal ID of the new
responsible.
Ordnet einem Prozessticket einen Service zu. Das Ticket benötigt einen Kunden und der Service muss diesem Kunden zugeordnet sein. Beispiel:
$Self->{'Process::TransitionAction'} = {
'TA1' => {
Name => 'Set MyService service',
Module => 'Kernel::System::ProcessManagement::TransitionAction::TicketServiceSet',
Config => {
Service => 'MyService',
# or
ServiceID => 123,
},
},
};
Name specifies the name of the configured
TransitionAction.
Service defines the new service of the process
ticket. The full name is required
(e.g. GramdFatherService::FatherService::SonService ).
ServiceID defines the internal ID of the new service.
Ordnet eine Service-Level-Vereinbarung einem Prozessticket zu. Das Ticket muss einen Service haben und das SLA muss diesem Service zugeordnet sein. Beispiel:
$Self->{'Process::TransitionAction'} = {
    'TA1' => {
        Name   => 'Set MySLA SLA',
        Module => 'Kernel::System::ProcessManagement::TransitionAction::TicketSLASet',
        Config => {
            SLA   => 'MySLA',
            # or
            SLAID => 123,
        },
    },
};
Name specifies the name of the configured
TransitionAction.
SLA defines the new service level agreement of the
process ticket.
SLAID defines the internal ID of the new SLA.
Ändert den Status eines Prozesstickets. Beispiel:
$Self->{'Process::TransitionAction'} = {
'TA1' => {
Name => 'Set State to open',
Module => 'Kernel::System::ProcessManagement::TransitionAction::TicketStateSet',
Config => {
State => 'open',
# or
StateID => 4,

PendingTimeDiff => 123,
},
},
};
Name specifies the name of the configured
TransitionAction.
State defines the new state of the process ticket.
StateID defines the internal ID of the new state.
PendingTimeDiff used only for pending type states,
defines the time difference in seconds relative (relative to the Transition
Action execution time) to set ticket pending time (e.g. 3600 means that the
pending time is 1hr after the Transition Action is executed).
Setzt den Tickettitel eines Prozesstickets. Beispiel:
$Self->{'Process::TransitionAction'} = {
'TA1' => {
Name => 'Set Ticket Title to Ticket-title',
Module => 'Kernel::System::ProcessManagement::TransitionAction::TicketTitleSet',
Config => {
Title => 'Ticket-title',
},
},
};
Name specifies the name of the configured
TransitionAction.
Title specifies the new title of the ticket.
Setzt den Tickettyp eines Prozesstickets. Beispiel:
$Self->{'Process::TransitionAction'} = {
'TA1' => {
Name => 'Set Ticket Type to default',
Module => 'Kernel::System::ProcessManagement::TransitionAction::TicketTypeSet',
Config => {
Type => 'default',
# or
# TypeID => '1',
},
},
};
Name specifies the name of the configured
TransitionAction.
Type specifies the name of the ticket type.
TypeID specifies the internal ID of the ticket type.
Mit der Hilfe von ACLs, können Sie die auswählbaren Werte in Prozesstickets limitieren. Weitere Beschreibungen der ACL-Syntax finden Sie in der ACL-Referenz
ACLs können nur in der Kernel/Config.pm definiert
werden. Beispiel:
$Self->{TicketAcl}->{'001-ACL-ProcessProperties'} = {
Properties => {
Process => {
ProcessEntityID => ['P1'],
ActivityEntityID => ['A1'],
ActivityDialogEntityID => ['AD1'],
}
},
Possible => {
ActivityDialog => ['AD1', 'AD3'],
},
PossibleNot => {
ActivityDialog => ['AD3'],
},
};
Name der ACL-Regel. Für weitere Informationen über ACL-Regeln konsultieren Sie bitte das Kapitel über ACLs.
This is the section that is used to check if an ACL must be applied. If it has the specified values, the rule is applied. The following values can be used:
The ID of a process that the process. Matches if the ticket is assigned to this process.
Hier können Sie eine Liste von Aktivitätsdialogen-Nummern definieren. Diese Liste beschränkt die möglichen Aktivitätsdialoge die dem Agenten in der TicketZoom-Oberfläche angeboten werden.
Possible lists the Activity Dialogs that are allowed. The
setting above will only allow AD1 and
AD3 of the list of configured Activity Dialogs.
PossibleNot lists the Activity Dialogs that are not
allowed. In the example above, the setting will remove
AD3 from the list of configured Activity Dialogs.
If both Possible and PossibleNot are
specified, the list of configured Activity Dialogs will first be filtered by
Possible, leaving only AD1 and
AD3 in our example. Then PossibleNot
will be applied and filter out AD3, so that only
AD1 remains and is shown as a possible Activity Dialog
that the user can use.
Wenn mehrere ACL-Regeln übereinstimmen, wird der Durchschnitt aller passenden Regeln berechnet um die möglichen Aktivitätsdialoge zu bestimmen. Beispiel:
Configured Activity Dialogs: AD1, AD2,
AD3, AD4, AD5,
AD6, AD7.
$Self->{TicketAcl}->{'001-ACL-Status'} = {
    Properties => {
        Ticket => {
            Status => 'new',
        }
    },
    Possible => {
        ActivityDialog => ['AD1', 'AD2', 'AD3', 'AD6', 'AD7'],
    },
};
$Self->{TicketAcl}->{'002-ACL-Queue'} = {
    Properties => {
        Ticket => {
            Queue => ['Raw']
        }
    },
    Possible => {
        ActivityDialog => ['AD2', 'AD3', 'AD4', 'AD7'],
    },
};
$Self->{TicketAcl}->{'003-ACL-Priority'} = {
    Properties => {
        Ticket => {
            Priority => ['3 normal']
        }
    },
    PossibleNot => {
        ActivityDialog => ['AD3', 'AD4'],
    },
};
If a process ticket has the state new, is in the
Raw queue and has a priority 3 normal,
then all three ACL rules will match.
The first rule reduces the Activity Dialogs from AD1,
AD2, AD3, AD4,
AD5, AD6, AD7 to
AD1, AD2, AD3,
AD6, AD7 and forbids
AD4 and AD5.
The second rule will now further reduce the remaining Activity Dialogs. In
our example, AD2, AD3,
AD7 will remain.
Now the third rule will further reduce the list by
PossibleNot. AD3 is removed from the
list. AD4 is not removed, since it was not on the list in
the first place. At the end, AD2 and
AD7 remain as possible Activity Dialogs that the user can
utilize.
It is also possible to limit the processes that can be displayed in the
New process ticket screen. The functionality is similar
to limiting the Activity Dialogs with one exception: The ACLs could only be
based on Users.
Siehe Beispiele:
$Self->{TicketAcl}->{'200-ACL-Process'} = {
    # match properties
    Properties => {
        User => {
            UserID => [2, 3],
        },
    },
    Possible => {
       Process => ['P1', 'P2', 'P3'],
    },
    PossibleNot => {
        Process => ['P4'],
    },
};
$Self->{TicketAcl}->{'201-ACL-Process'} = {
    # match properties
    Properties => {
        User => {
            Group_rw => [ 'MyGroup' ],
        },
    },
    Possible => {
       Process => ['P1', 'P2', 'P3'],
    },
    PossibleNot => {
        Process => ['P4'],
    },
};
$Self->{TicketAcl}->{'202-ACL-Process'} = {
    # match properties
    Properties => {
        User => {
            Role => [ 'MyRole' ],
        },
    },
    Possible => {
       Process => ['P1', 'P2', 'P3'],
    },
    PossibleNot => {
        Process => ['P4'],
    },
};
On the AdminProcessManagement screen you can find an Ready2Adopt Processes widget, where you can find best practice Ready2Adopt processes. Currently, there is only an Application for leave process available, but you can find additional Ready2Adopt processes in the OTRS Business Solution™.
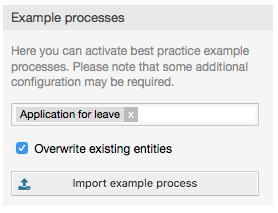
Select process from the drop-down menu and click on the Import Ready2Adopt process button. After the process is imported, don't forget to deploy changes.